There’s something undeniably refreshing about a dessert that requires no baking, especially when it tastes as luscious as this No-Bake Chocolate Tart. The moment I first sampled this decadent treat, I was blown away by its rich flavor and creamy texture. It felt like a little slice of heaven, all while being surprisingly simple to make.
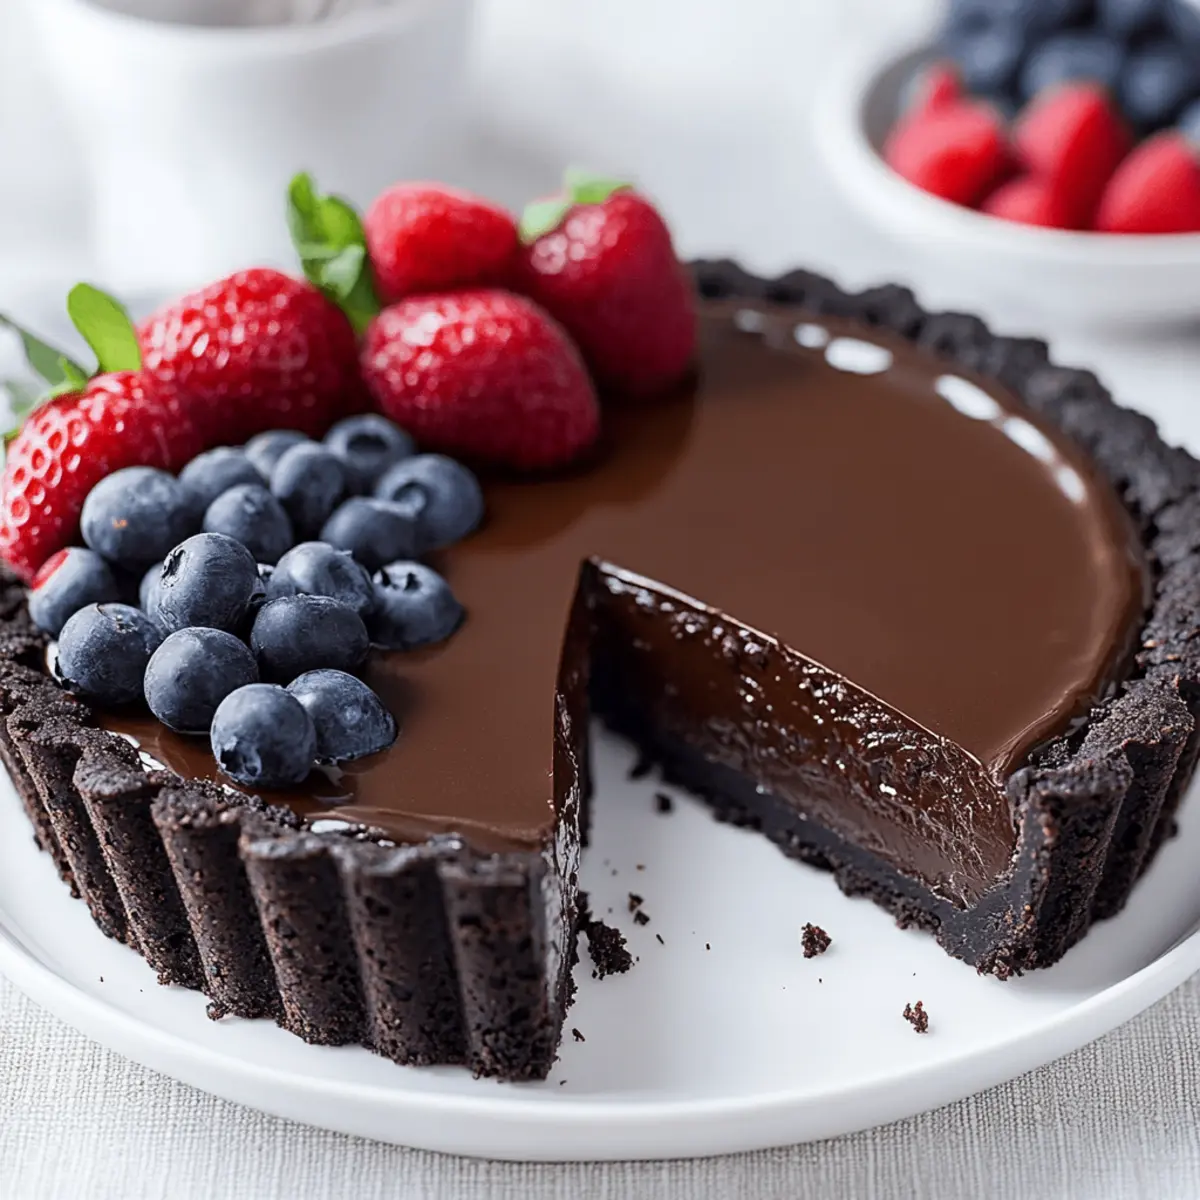
Picture this: a crumbly chocolate cookie crust that cradles a silky chocolate filling, waiting patiently in your fridge to be devoured. Whether you’re celebrating a special occasion or just craving a sweet escape from the mundane, this tart will fit the bill. It’s the perfect antidote to the fast food fatigue that seems to catch up with us all.
With just a handful of ingredients and minimal time in the kitchen, you’ll impress guests and treat yourself to something truly indulgent. Let me guide you through this delightful recipe that will have everyone asking for seconds!
Why You'll Love This No-Bake Chocolate Tart
- This No-Bake Chocolate Tart is incredibly easy to make, allowing anyone to whip up a delicious dessert with minimal effort.
- The rich chocolate flavor and creamy texture are bound to satisfy even the most discerning sweet tooth.
- Its versatility means you can dress it up with whipped cream, chocolate shavings, or fresh berries for an elegant touch or enjoy it simply as is.
- Not only does it save you time by eliminating the need for baking, but it’s also a guaranteed crowd-pleaser that will leave your guests raving about your culinary skills.
No-Bake Chocolate Tart Ingredients
For the Crust
• Chocolate cookie crumbs – a delicious foundation for your tart, providing a rich, chocolaty flavor.
• Unsalted butter – helps bind the crumbs together for a sturdy crust; make sure it’s melted for even mixing.
For the Filling
• Heavy cream – adds creaminess and richness to the filling; be sure to heat it gently for the best results.
• Semi-sweet chocolate – the star ingredient that offers a deep, luxurious chocolate taste in your No-Bake Chocolate Tart.
• Powdered sugar – sweetens the filling without the grainy texture of granulated sugar, blending perfectly.
• Vanilla extract – enhances the flavor of chocolate, giving it a warm, aromatic note.
• Pinch of salt – balances the sweetness and elevates the chocolate flavor.
Optional Toppings
• Whipped cream – adds a light, airy texture and enhances the dessert’s visual appeal when dolloped on top.
• Chocolate shavings – a simple yet elegant way to garnish your tart, making it even more indulgent.
• Fresh berries – add a pop of color and a refreshing contrast to the rich chocolate flavor.

How to Make No-Bake Chocolate Tart
-
Mix the Crust: In a mixing bowl, combine the chocolate cookie crumbs and melted butter. Stir until the crumbs are evenly coated, creating a delightful chocolatey mix!
-
Press into Pan: Firmly press the mixture into the bottom and up the sides of a 9-inch tart pan. Use the back of a measuring cup or your fingers to ensure an even layer—you want a sturdy base!
-
Chill the Crust: Place the crust in the refrigerator to set while you prepare the filling. This helps it become firm and ready to hold the luscious filling.
-
Heat the Cream: In a small saucepan over medium heat, bring the heavy cream to a simmer. Remove from heat just before it starts boiling; the warmth should coax out the flavors beautifully.
-
Melt the Chocolate: Add the chopped semi-sweet chocolate to the hot cream and let it sit for about 2-3 minutes to soften. This will create an amazing melted mixture.
-
Whisk Smooth: Whisk the mixture until smooth and fully combined. Stir in the powdered sugar, vanilla extract, and a pinch of salt until everything is well incorporated.
-
Fill the Crust: Remove the crust from the refrigerator and pour the chocolate filling into the prepared crust. Spread it evenly with a spatula, creating a beautiful and enticing top layer.
-
Chill to Set: Cover the tart with plastic wrap and place it in the refrigerator for at least 4 hours, or until the filling is set. Patience makes for a perfect dessert!
-
Garnish and Serve: Once set, remove the tart from the refrigerator. Top with whipped cream, chocolate shavings, and fresh berries if desired for an irresistible presentation.
-
Slice and Enjoy: Slice the tart and serve chilled, savoring each forkful of its creamy, indulgent goodness with friends and family.
Optional: For an extra touch of elegance, sprinkle some sea salt on top before serving.
Exact quantities are listed in the recipe card below.
Make Ahead Options
These No-Bake Chocolate Tart preparations are perfect for busy home cooks looking to save time! You can prepare the crust up to 24 hours in advance by assembling it and pressing it into the tart pan, then refrigerating it until needed. Likewise, the chocolate filling can be mixed and stored in an airtight container in the fridge for up to 3 days before pouring it into the crust. To maintain quality, make sure everything is tightly covered to prevent any absorption of odors from your refrigerator. When you’re ready to serve, simply pour the filling into the chilled crust, let it set for at least 4 hours, and top it off with whipped cream, chocolate shavings, and fresh berries as desired. Enjoy the effortless satisfaction of this delightful dessert with minimal last-minute effort!
What to Serve with No-Bake Chocolate Tart?
Indulge in a dessert experience that delights the senses and complements the rich chocolatey goodness of your tart.
- Fresh Berries: Their bright tartness balances the chocolate’s richness, adding a burst of freshness and color.
- Whipped Cream: A classic accompaniment that introduces a light, airy texture, making each bite feel divine.
- Chocolate Sauce: For true chocolate lovers, drizzling warm chocolate sauce over each slice amplifies the indulgent experience.
- Ice Cream: A scoop of vanilla or raspberry sorbet provides a creamy or fruity counterpoint to the deep chocolate flavor.
- Coffee: A rich espresso pairs beautifully with the tart, enhancing the chocolate’s complexity while offering a cozy drink option.
- Mint Leaves: Adding a sprig of fresh mint not only elevates presentation but also brings a refreshing aroma to each forkful.
- Almonds: Toasted, sliced almonds add a wonderful crunch and nutty flavor that complements the creamy filling.
- Red Wine: A glass of sweet red wine or dessert wine enhances the experience, making for a decadent pairing that feels luxurious.
- Mini Fruit Tarts: Serve alongside for a fun dessert display, adding different textures and flavors that contrast beautifully with the chocolate tart.
- Cheese Platter: A selection of mild cheeses can soften the sweetness and provide a savory balance to the dessert’s richness.
How to Store and Freeze No-Bake Chocolate Tart
Fridge: Store the No-Bake Chocolate Tart in an airtight container for up to 5 days. Keep it chilled to maintain the rich texture and flavor.
Freezer: If you want to save it for later, you can freeze the tart wrapped tightly in plastic wrap for up to 3 months. Thaw it in the fridge before serving.
Reheating: This tart is best served chilled; do not attempt to reheat it. Instead, just allow it to soften slightly at room temperature before slicing.
Garnishing: If you’ve topped the tart with whipped cream or berries, it’s best enjoyed fresh, but you can keep the base stored separately for extended freshness.
No-Bake Chocolate Tart Variations
Feel free to get creative with your No-Bake Chocolate Tart; it’s all about making it your own!
-
Gluten-Free: Use gluten-free chocolate cookies to make the crust, ensuring everyone can enjoy this indulgent dessert.
-
Nutty Crunch: Add 1/2 cup of finely chopped nuts, like almonds or hazelnuts, to the crust for an extra layer of texture and flavor. This will bring a delightful crunch that contrasts beautifully with the silky chocolate.
-
Dairy-Free: Substitute coconut cream or almond milk in place of heavy cream for a dairy-free version that’s still rich and delicious. Your taste buds won’t miss the dairy at all!
-
Mint Chocolate: Stir in a few drops of peppermint extract to the chocolate filling for a refreshing minty twist, perfect for the holiday season or anyone who loves a mint-chocolate combo. Imagine the burst of coolness with every slice!
-
Spicy Kick: Add a pinch of cayenne pepper or a dash of cinnamon to the filling for a surprising spicy kick that enhances the rich chocolate flavor. This simple addition can take your tart to a whole new level.
-
Fruit Fusion: Blend in some pureed fruits, like raspberries or bananas, into the chocolate filling to create a fruity explosion of flavor. This twist is vibrant and adds a lovely touch of sweetness.
-
Coffee Buzz: Incorporate a shot of espresso or a teaspoon of instant coffee granules into the melted chocolate for a mocha-flavored dessert that’ll energize your taste buds. The combination of chocolate and coffee is a classic for a reason!
-
Caramel Drizzle: Drizzle homemade or store-bought caramel sauce on top before serving, adding a luxurious sweetness that will leave everyone wanting more. The gooey caramel will be the cherry on top of your heavenly masterpiece!
Chef's Helpful Tips
- For the No-Bake Chocolate Tart, ensure your crust holds together by pressing the cookie crumb mixture firmly into the tart pan, leaving no air pockets.
- A common mistake is overheating the cream, so keep it on medium heat and remove it just before boiling; this will help maintain the rich flavor of the chocolate.
- When melting the chocolate, allow it to sit in the hot cream for 2-3 minutes before whisking to achieve a smooth and shiny filling.
- Lastly, patience is key, as refrigerating the tart for at least 4 hours guarantees the filling sets perfectly for slicing.
No-Bake Chocolate Tart Recipe FAQs
What type of chocolate should I use for the filling?
Absolutely! For this No-Bake Chocolate Tart, I recommend using semi-sweet chocolate for its perfect balance of sweetness and rich flavor. If you prefer a darker taste, feel free to substitute with dark chocolate, ensuring it’s at least 60% cacao for the best results.
How do I know when the tart filling is set?
Very! The filling should be firm to the touch and hold its shape when you gently press it. After chilling for at least 4 hours, if it’s still jiggly in the center, let it set longer in the refrigerator. If you’re in doubt, give it an extra hour or two—patience pays off!
Can I store leftover No-Bake Chocolate Tart, and how?
Yes, indeed! Store your No-Bake Chocolate Tart in an airtight container or covered with plastic wrap in the refrigerator. It will stay fresh for up to 5 days. Just be sure to keep it cool, away from any strong odors to maintain that luscious chocolate flavor!
How can I freeze the No-Bake Chocolate Tart?
Absolutely! To freeze, slice the tart first and wrap each piece tightly in plastic wrap. Then, place the wrapped slices in a freezer-safe container or bag. It will remain delicious for up to 3 months. When you’re ready to indulge, simply move a slice to the fridge overnight to thaw, or let it sit at room temperature for about 30 minutes.
Is this dessert suitable for people with dietary restrictions?
Very! You can easily make this No-Bake Chocolate Tart gluten-free by using gluten-free chocolate cookie crumbs. If you’re concerned about dairy, opt for vegan chocolate and coconut cream as a replacement for the heavy cream. Just be sure to check for any allergies to ensure everyone can enjoy a slice!
What should I do if my crust crumbles when I try to slice it?
No worries! If your crust crumbles, it’s likely that it hasn’t been pressed firmly enough into the pan or there’s not enough butter to bind it. Next time, try pressing down more firmly to create a well-integrated crust. If you’re running into this issue after it’s set, using a hot, dry knife to slice can help make cleaner edges. Enjoy every delicious bite, even if it’s a bit rustic!
Equipment
- 9-inch tart pan
- Mixing bowl
- small saucepan
- Whisk
- spatula
Ingredients
Crust
- 2 cups chocolate cookie crumbs a delicious foundation for your tart, providing a rich, chocolaty flavor.
- 6 tablespoons unsalted butter melted for even mixing.
Filling
- 1 cup heavy cream adds creaminess and richness to the filling.
- 8 ounces semi-sweet chocolate the star ingredient for deep chocolate taste.
- 1/4 cup powdered sugar sweetens the filling without graininess.
- 1 teaspoon vanilla extract enhances chocolate flavor.
- 1 pinch salt balances sweetness.
Optional Toppings
- whipped cream adds a light texture when dolloped on top.
- chocolate shavings elegantly garnish the tart.
- fresh berries adds a refreshing contrast.
Instructions
Preparation
- In a mixing bowl, combine the chocolate cookie crumbs and melted butter. Stir until the crumbs are evenly coated.
- Firmly press the mixture into the bottom and up the sides of a 9-inch tart pan.
- Place the crust in the refrigerator to set while you prepare the filling.
- In a small saucepan over medium heat, bring the heavy cream to a simmer. Remove from heat just before boiling.
- Add the chopped semi-sweet chocolate to the hot cream and let it sit for about 2-3 minutes.
- Whisk the mixture until smooth and fully combined, then stir in the powdered sugar, vanilla extract, and a pinch of salt.
- Remove the crust from the refrigerator and pour the chocolate filling into the crust, spreading it evenly.
- Cover the tart with plastic wrap and place it in the refrigerator for at least 4 hours, or until set.
- Top the tart with whipped cream, chocolate shavings, and fresh berries if desired.
- Slice the tart and serve chilled.