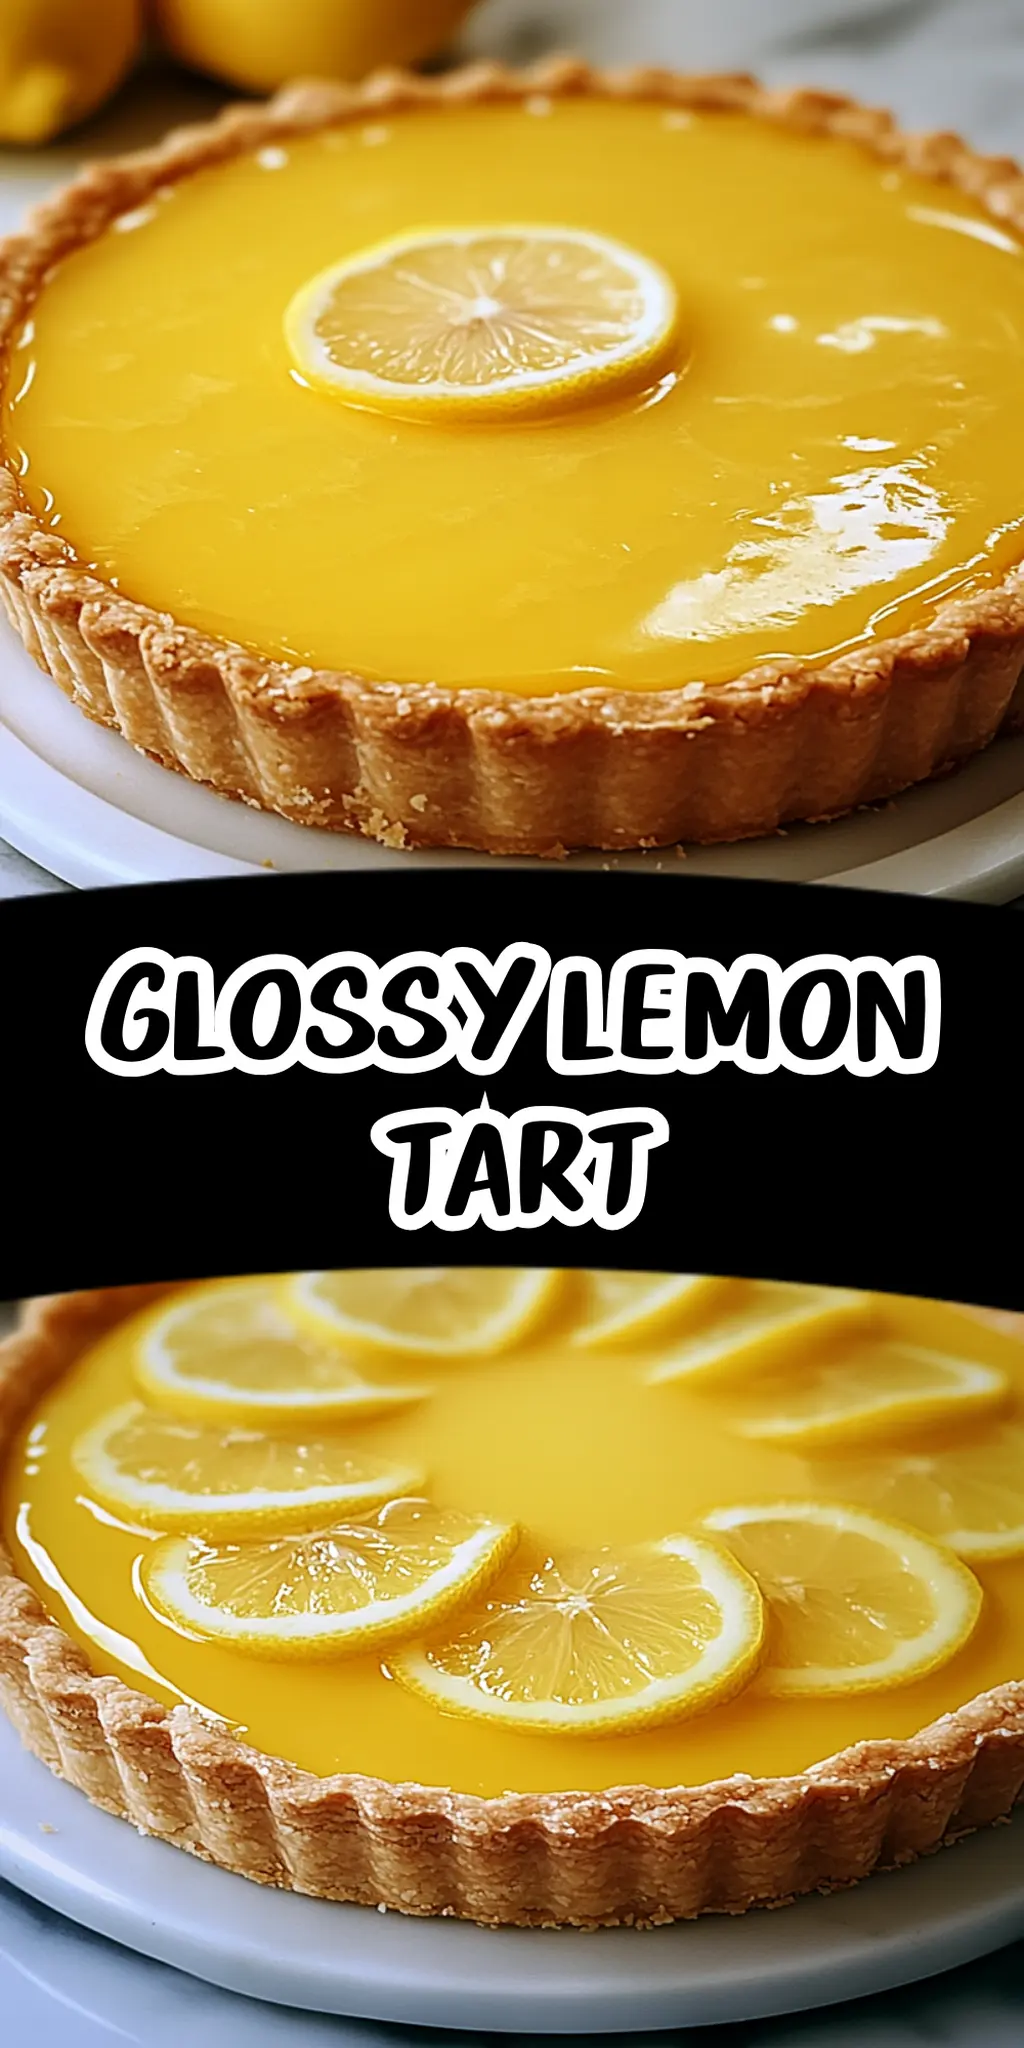
There’s nothing quite like the burst of tartness mixed with the smooth sweetness of a well-made dessert. The moment I took my first bite of a shiny, enticing glossy lemon tart at a friend’s gathering, I was hooked. Its vibrant flavor danced on my taste buds, making it the perfect end to any meal or a delightful treat on its own.

This recipe allows you to bring that blissful experience right into your kitchen, transforming simple ingredients into a standout dish that’s sure to impress. Even if you’re not a pro in the kitchen, the steps are straightforward, making it doable for everyone, from seasoned chefs to novice bakers. With its buttery crust and delicious lemon filling, this glossy lemon tart is not just visually stunning but also a crowd-pleaser at any gathering.
So, let’s dive into a delightful journey of zest and sweetness, as I guide you through creating this fresh, eye-catching dessert that will have everyone asking for seconds!
Why You'll Love This Glossy Lemon Tart
- This glossy lemon tart is incredibly easy to make, allowing bakers of all skill levels to create a stunning dessert with minimal effort.
- The vibrant and zesty flavor of the lemon filling combined with the buttery crust will tantalize your taste buds and leave you craving more.
- Its versatility means you can serve it for any occasion, from casual family dinners to sophisticated dinner parties, making it a go-to recipe for any season.
- With its eye-catching glossy finish, this tart not only tastes amazing but also adds a touch of elegance to your dessert table that will impress your guests.
Glossy Lemon Tart Ingredients
For the Crust
• All-purpose flour – a key ingredient for a tender, flaky texture.
• Unsalted butter – must be cold and cubed to prevent melting before baking, ensuring a crisp crust.
• Powdered sugar – adds a subtle sweetness and helps keep the dough tender.
• Salt – enhances all the flavors in the crust.
• Large egg yolk – binds the ingredients together and adds richness.
• Cold water – adds just enough moisture to bring the dough together.
For the Filling
• Large eggs – provide structure and creaminess to the lemon filling.
• Granulated sugar – balances the tartness of the lemon juice, creating that perfect sweetness.
• Fresh lemon juice – the star ingredient that gives your tart its tangy flavor; about 2-3 lemons should yield enough.
• Lemon zest – intensifies the fresh lemon flavor in the filling.
• Heavy cream – adds a velvety texture to the filling, making it rich and luscious.
For the Glaze
• Water – creates the base for your glossy glaze.
• Granulated sugar – sweetens your glaze for a harmonious finish.
• Cornstarch – thickens the glaze nicely without altering the flavor.
• Fresh lemon juice – adds a zing to keep the glaze balanced.
• Lemon zest – brightens the glaze with additional citrus aroma.
With this harmonious blend of ingredients, your Glossy Lemon Tart will shine beautifully!
How to Make Glossy Lemon Tart
-
Mix the Dry Ingredients: In a large bowl, combine the flour, powdered sugar, and salt. Add the cold, cubed butter, mixing until the mixture resembles coarse crumbs, which should take about 3-4 minutes.
-
Combine and Form Dough: Stir in the egg yolk and add cold water, one tablespoon at a time, until the dough comes together. Aim for a slightly sticky texture that holds together well.
-
Chill the Dough: Form the dough into a disk, wrap it in plastic wrap, and refrigerate for at least 30 minutes. This step is crucial for a flaky crust!
-
Preheat the Oven: Preheat your oven to 350°F (175°C) while the dough chills. This ensures it’s perfectly hot when you’re ready to bake.
-
Roll out the Dough: On a floured surface, roll out the chilled dough to fit a 9-inch tart pan. Place it into the pan, pressing it gently, and trim the edges for a clean look.
-
Blind Bake the Crust: Line the crust with parchment paper and fill with pie weights or dried beans. Bake for 15 minutes, then remove the weights and parchment, and bake for an additional 10 minutes until lightly golden. Let the crust cool.
-
Prepare the Filling: In a medium bowl, whisk together the eggs and granulated sugar until well combined, achieving a smooth, pale mixture.
-
Add Lemon Goodness: Stir in the fresh lemon juice and lemon zest, mixing well to ensure every bite is packed with that zesty flavor.
-
Fold in Heavy Cream: Gently fold in the heavy cream until smooth, creating a rich filling that flows easily.
-
Fill the Tart Shell: Pour the lemon filling into the cooled tart shell, spreading it evenly to ensure a beautiful finish.
-
Bake the Filling: Bake in the preheated oven for 25-30 minutes, or until the filling is set but slightly jiggly in the center. A little wobble means it’s perfectly creamy!
-
Cool and Chill: Remove from the oven and let cool to room temperature, then refrigerate for at least 2 hours to set that luscious filling.
-
Make the Glaze: In a small saucepan, combine the water, granulated sugar, cornstarch, lemon juice, and lemon zest. Whisk until smooth, ensuring there are no lumps.
-
Thicken the Glaze: Bring the mixture to a boil over medium heat, stirring constantly until thickened, which should take about 4-5 minutes.
-
Glaze the Tart: Pour the cooled glaze over the set lemon tart, spreading it evenly to create a glossy finish that elevates this dessert to new heights.
-
Final Chill: Refrigerate the tart for another 30 minutes to allow the glaze to set beautifully.
-
Slice and Serve: Carefully slice the tart and serve chilled, taking pride in every delicious bite.
Optional: Garnish with thin lemon slices for an extra touch of elegance.
Exact quantities are listed in the recipe card below.
How to Store and Freeze Glossy Lemon Tart
Room Temperature: Store any leftover slices at room temperature for up to 1 day, covered with a cake dome or plastic wrap to keep them fresh.
Fridge: For longer freshness, refrigerate the tart for up to 3 days. Ensure it’s covered tightly to prevent any absorption of odors from the fridge.
Freezer: You can freeze the tart without the glaze for up to 2 months. Wrap it tightly in plastic wrap and place it in an airtight container. Thaw in the refrigerator before serving.
Reheating: If desired, reheat individual slices gently in the microwave for about 10-15 seconds to soften the filling, but enjoy it chilled for the best flavor!
What to Serve with Glossy Lemon Tart?
There’s something magical about how the refreshing tang of lemon brings a meal together, making it feel complete and delightful.
-
Vanilla Ice Cream: The creamy richness balances the tartness, creating a delightful contrast that melts in your mouth.
-
Fresh Berries: Strawberries, raspberries, or blueberries add a pop of color and sweetness, enhancing the joyful presentation.
-
Minted Whipped Cream: A dollop of lightly sweetened, fresh mint-infused cream adds a refreshing brightness that complements the lemon’s zest.
-
Honey-Glazed Almonds: The nutty crunch and slight sweetness add texture and elevate each bite of the tart, creating a delightful experience.
-
Espresso or Coffee: A robust cup of coffee balances the sweetness and acidity, making for a perfect pairing with the dessert.
-
Sparkling Water with Citrus: The refreshing fizz, coupled with lemon slices, makes for a rejuvenating drink that echoes the tart’s flavor profile.
-
Shortbread Cookies: These buttery cookies offer a tender crunch that makes an excellent companion, perfect for a sweet nibble alongside each slice.
-
Chocolate Ganache: A drizzle of rich ganache can create an indulgent twist, enhancing the flavor while adding a touch of decadence.
These pairings will surely craft a memorable dining experience that delights the senses!
Make Ahead Options
These Glossy Lemon Tarts are a wonderful choice for meal prep, allowing you to savor every bite without the fuss on the day of serving! You can prepare the tart crust up to 3 days in advance by baking it and storing it tightly wrapped in plastic wrap in the refrigerator to maintain its crispiness. The lemon filling can also be made ahead; simply refrigerate it for up to 24 hours. When you’re ready to enjoy, pour the filling into the cooled tart shell, bake as directed, and finish with the glaze. This way, you’ll have a genuinely delightful dessert ready to impress, and the flavors will be just as vibrant and delicious as when freshly made!
Glossy Lemon Tart Variations
Customize your glossy lemon tart to suit your taste preferences and dietary needs with these delightful twists!
-
Gluten-Free: Substitute all-purpose flour with a gluten-free flour blend for a perfect crust. This way, everyone can enjoy the goodness of lemon!
-
Dairy-Free: Use coconut oil or a dairy-free butter substitute in the crust and replace heavy cream with coconut cream for a light, tropical touch.
-
Sweetener Swap: Try using honey, maple syrup, or agave nectar instead of granulated sugar for a different sweetness profile that shines through.
-
Lemon Lovers: Amplify the lemon flavor by increasing the zest or adding a few drops of pure lemon extract into the filling for that extra zing!
-
Berry Bliss: Add a layer of fresh blueberries or raspberries on top of the tart before glazing. The combination of berries with lemon creates an invigorating burst of flavor.
-
Herbal Infusion: Incorporate finely chopped fresh herbs like thyme or basil into the glaze for a fragrant twist that adds an unexpected depth of flavor.
-
Citrus Medley: Mix in other citrus juices such as orange or lime for a vibrant, tangy filling that invigorates your taste buds in a delightful new way.
-
Spicy Citrus: Add a pinch of cayenne pepper or ginger to the filling for a subtle kick that perfectly contrasts the sweetness of the tart.
Chef's Helpful Tips
- For the Glossy Lemon Tart, ensure your butter is very cold to achieve that flaky texture in the crust, as warm butter can lead to a tough pastry.
- When mixing your flour and sugar, aim for a coarse crumb texture before adding the egg yolk to maintain the right consistency in dough.
- When incorporating the lemon juice and sugar for the filling, whisk thoroughly to dissolve the sugar completely, as undissolved sugar can create a gritty texture.
- Finally, keep an eye on your tart during baking; removing it from the oven while the center is still slightly jiggly will ensure a creamy, smooth filling.
Glossy Lemon Tart Recipe FAQs
How do I know if my lemons are ripe?
Absolutely! Look for lemons that are bright in color, feel heavy for their size, and have a slight give when pressed. Avoid any that have dark spots or are overly wrinkled, as these are signs of overripeness.
How should I store leftovers of my glossy lemon tart?
For maximum freshness, refrigerate your glossy lemon tart for up to 3 days. Ensure it is tightly covered with plastic wrap or stored in an airtight container to prevent it from absorbing other odors and flavors in the fridge.
Can I freeze my glossy lemon tart?
Very! You can freeze the tart without the glaze for up to 2 months. To freeze, wrap it tightly in plastic wrap and place it in an airtight container or a freezer bag. When you’re ready to enjoy it, simply thaw in the refrigerator overnight.
What should I do if my filling didn’t set properly?
If your filling didn’t set, don’t worry! First, ensure you baked it long enough; it should be slightly jiggly but not liquid. If it still feels too loose, you can bake it an additional 5-10 minutes. If you’re facing this issue after it’s cooled, you might want to make a new filling, adding a bit more cornstarch next time for extra thickness.
Are there any dietary considerations I should be aware of?
Definitely! If you’re preparing this dessert for someone with dietary restrictions or allergies, consider using a gluten-free flour blend to keep the crust gluten-free. For those allergic to dairy, you can replace the heavy cream with coconut cream for a non-dairy version. It’s always wise to double-check specific ingredient labels for allergens when accommodating special diets.
Can I make adjustments to the sweetness of the tart?
Of course! If you prefer a less sweet lemon tart, reduce the amount of granulated sugar in the filling by about 1/4 cup. Just remember that the balance between the tartness of the lemons and the sweetness is key, so adjust cautiously to maintain the overall flavor harmony of the glossy lemon tart.
Equipment
- 9-inch tart pan
- large bowl
- Medium bowl
- Whisk
- saucepan
- Plastic Wrap
- Parchment paper
Ingredients
Crust
- 1 cup All-purpose flour
- 1/2 cup Unsalted butter cold and cubed
- 1/4 cup Powdered sugar
- 1/4 tsp Salt
- 1 large Egg yolk
- 1-2 tbsp Cold water
Filling
- 3 large Eggs
- 1 cup Granulated sugar
- 1/2 cup Fresh lemon juice from about 2-3 lemons
- 1 tbsp Lemon zest
- 1 cup Heavy cream
Glaze
- 1/2 cup Water
- 1/2 cup Granulated sugar
- 1 tbsp Cornstarch
- 1 tbsp Fresh lemon juice
- 1 tbsp Lemon zest
Instructions
Preparation
- In a large bowl, combine the flour, powdered sugar, and salt.
- Add the cold, cubed butter, mixing until the mixture resembles coarse crumbs, about 3-4 minutes.
- Stir in the egg yolk and add cold water, one tablespoon at a time, until the dough comes together.
- Form the dough into a disk, wrap in plastic wrap, and refrigerate for at least 30 minutes.
- Preheat your oven to 350°F (175°C).
- Roll out the chilled dough to fit a 9-inch tart pan and trim the edges.
- Line the crust with parchment paper and fill with pie weights or dried beans. Bake for 15 minutes, then remove the weights and bake for another 10 minutes until golden. Let cool.
Filling Preparation
- In a medium bowl, whisk the eggs and sugar until smooth.
- Stir in the lemon juice and zest.
- Fold in the heavy cream until smooth.
- Pour the lemon filling into the cooled tart shell and spread evenly.
- Bake for 25-30 minutes until the filling is set but slightly jiggly.
- Cool to room temperature, then refrigerate for at least 2 hours to set.
Glazing
- In a saucepan, combine the water, sugar, cornstarch, lemon juice, and zest. Whisk until smooth.
- Bring to a boil, stirring constantly until thickened, about 4-5 minutes.
- Pour the cooled glaze over the tart, spreading evenly.
- Refrigerate for another 30 minutes to set the glaze.
Serving
- Carefully slice the tart and serve chilled.