As the leaves begin to fall and the air turns crisp, I’m reminded of the joyful chaos that comes with hosting Thanksgiving gatherings. This is the time when kitchens become the heart of our homes, filling with laughter and the unmistakable aroma of sweet treats. It was during one of those bustling afternoons that I discovered the magic of Thanksgiving Cake Pops—a delightful fusion of cake and whimsy that’s as fun to make as it is to eat.

These adorable little bites are not just a treat; they’re a canvas for creativity with endless decorating possibilities. Whether you’re a seasoned baker or just dabbling in sweet creations, this recipe promises to be a showstopper at your holiday table. Easy to prepare yet impressively cute, these cake pops are the perfect solution to satisfy both kids and adults alike. So, grab your apron, and let’s turn a simple box of cake mix into a festive centerpiece that will have your guests reaching for seconds!
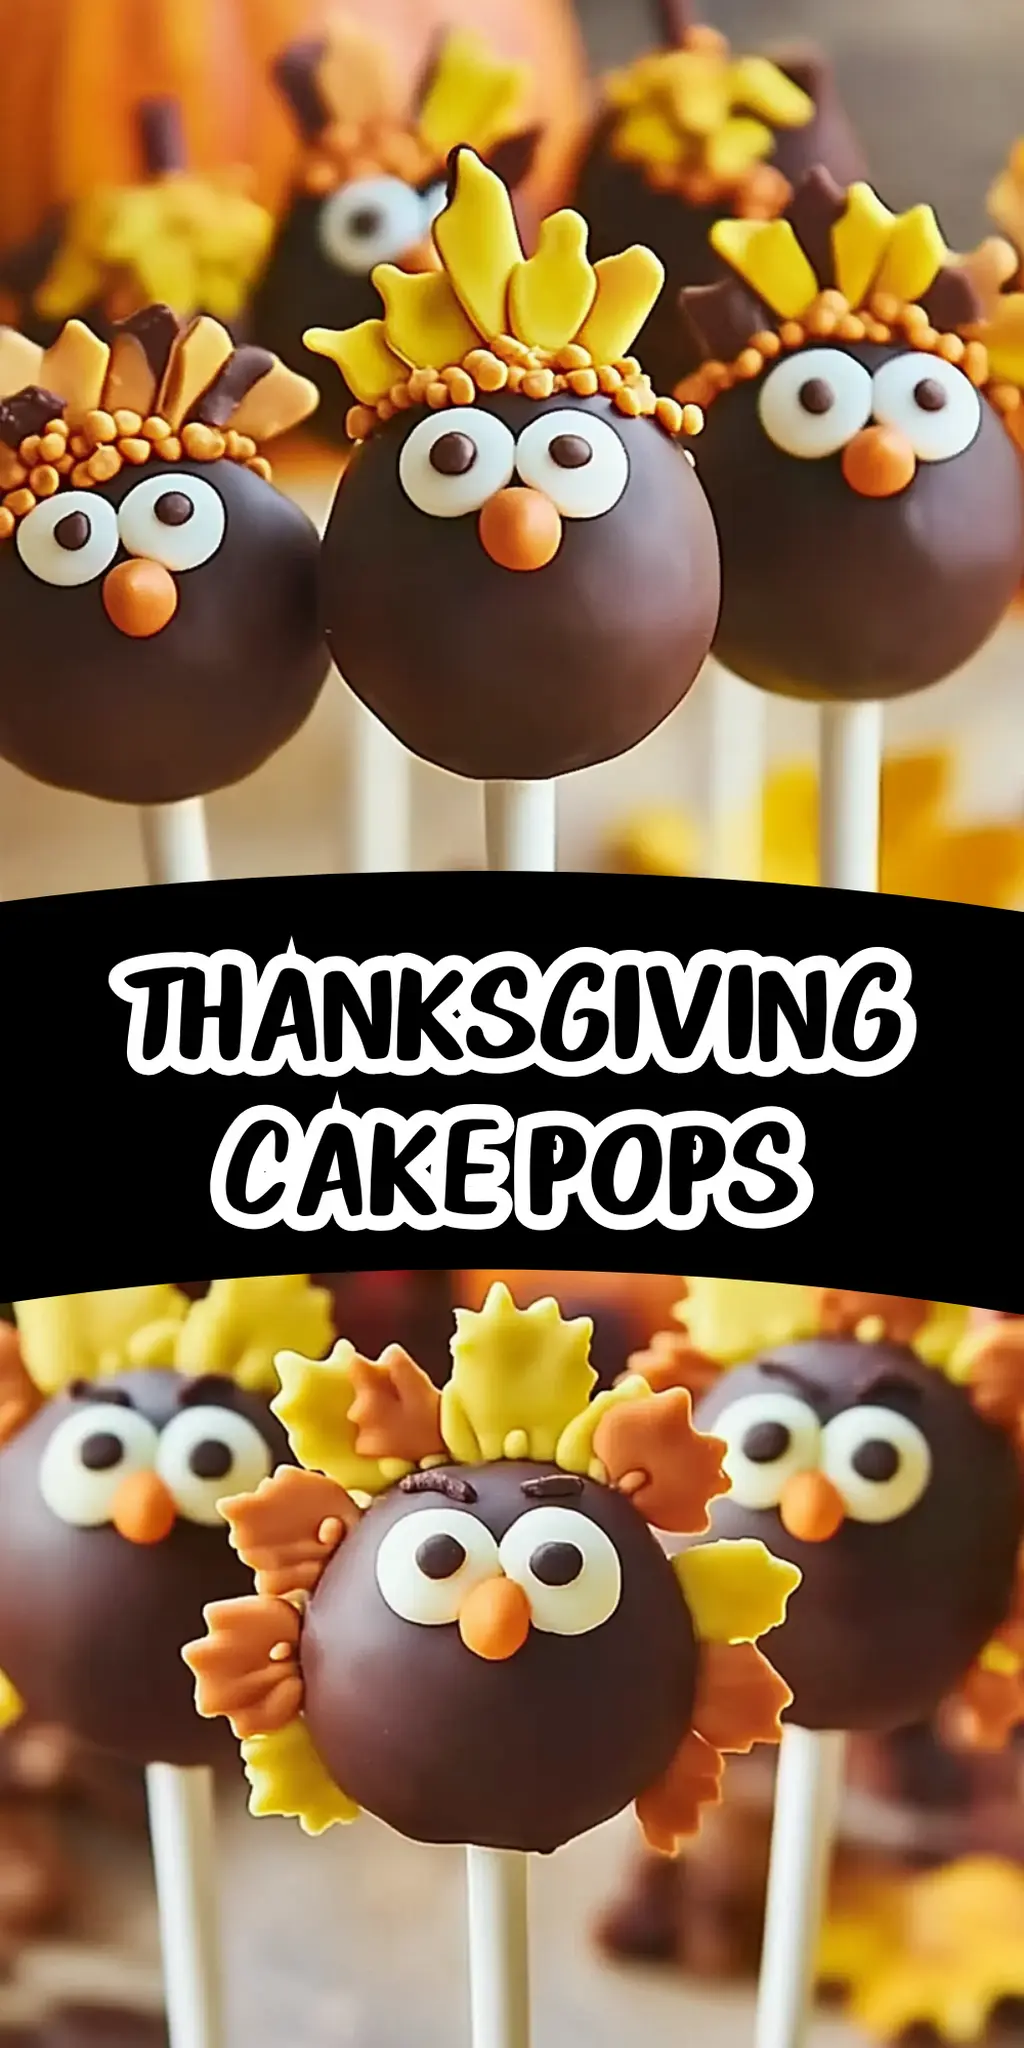
Why You'll Love This Thanksgiving Cake Pops
- These Thanksgiving Cake Pops are incredibly easy to make, allowing you to whip up a batch without a lot of fuss.
- The delightful combination of flavors and decorations makes them a guaranteed hit, appealing to both young and old.
- Their versatility means you can customize the toppings to match any festive theme, making them perfect for any gathering.
- Visually, they are a feast for the eyes with their vibrant colors and whimsical designs, sure to impress your guests and elevate your dessert table.
Thanksgiving Cake Pops Ingredients
Get ready to create some festive fun with these delicious treats!
For the Cake Mix
• Box cake mix – your base for these Thanksgiving Cake Pops; choose your favorite flavor!
For the Frosting
• Canned frosting – use store-bought for convenience or whip up a homemade version for extra love.
For the Coating
• Candy melts – these provide a smooth, colorful coating that kids will adore.
• Vegetable oil – a tablespoon helps achieve that perfect dipping consistency.
For Flavoring
• Vanilla extract – this adds a warm, inviting aroma that enhances the overall taste.
For Assembly
• Cake pop sticks – sturdy enough to hold your delightful creations without bending.
For Decorations
• Candy eyes – bring a cute, playful element to your pops with these fun add-ons.
• Candy corn – adding a festive touch, these are sure to delight everyone.
• Sprinkles – perfect for a burst of color and crunch on your cake pops.
• Edible glitter – for that extra sparkle, making your treats truly shine.
• Mini chocolate chips – add a rich chocolatey touch that complements the sweetness perfectly.
How to Make Thanksgiving Cake Pops
-
Preheat oven: Begin by preheating your oven according to the cake mix box instructions. This ensures an even bake, setting you up for success.
-
Bake the cake: Pour the cake batter into a prepared pan and bake until golden brown, about 30 minutes. Once done, allow it to cool completely.
-
Crumble the cake: After cooling, crumble the cake into fine crumbs using your hands or a fork, creating a texture perfect for mixing.
-
Combine with frosting: Next, mix in the frosting gradually, until the cake crumbs become moist enough to roll into balls. Aim for a soft, moldable consistency.
-
Form cake balls: Roll the mixture into small balls, each about 1-inch in diameter. Place them on a baking sheet lined with wax paper, ensuring they’re evenly spaced.
-
Prep sticks: Melt a small amount of candy coating and dip one end of each cake pop stick into it. This step helps secure the sticks when inserted into the cake balls.
-
Insert sticks: Gently insert the sticks into the center of each cake ball, about halfway through, ensuring they stay upright.
-
Melt candy coating: In a microwave-safe bowl, melt your candy melts along with vegetable oil until smooth, stirring regularly to avoid burning.
-
Dip the cake pops: Dip each cake pop into the melted candy coating, ensuring they are fully covered. Let any excess drip off for a smooth finish.
-
Decorate immediately: While the coating is still wet, decorate your pops with candy eyes, candy corn, sprinkles, or mini chocolate chips for a festive touch.
-
Set the cake pops: Stick the decorated cake pops into a Styrofoam block or place them on a parchment paper-lined tray. Allow them to dry for about 30 minutes to 1 hour.
-
Serve and enjoy: Once dry, your Thanksgiving Cake Pops are ready to serve! Gather around and enjoy these delightful treats with your loved ones.
Optional: Drizzle some melted chocolate on top for an extra touch of sweetness!
Exact quantities are listed in the recipe card below.
Thanksgiving Cake Pops Variations
Feel free to get creative with your cake pops and make them your own!
-
Gluten-Free: Use a gluten-free cake mix to accommodate those with dietary restrictions while still enjoying delicious cake pops.
-
Vegan: Swap the frosting for a dairy-free version and use vegan chocolate for dipping. Your pops will be equally delightful!
-
Chocolate Cake Pop Base: Opt for a chocolate cake mix for a rich flavor that pairs wonderfully with seasonal decorations like chocolate sprinkles or candy.
-
Pumpkin Spice Twist: Add a teaspoon of pumpkin spice to the batter for a seasonal flavor that captures the essence of fall.
-
Nutty Addition: Incorporate chopped nuts into the cake mixture for a delightful texture and flavor contrast; pecans or walnuts are perfect choices.
-
Spicy Heat: Drizzle some cayenne-infused chocolate on top to give your cake pops a surprising spicy kick, balancing the sweetness beautifully.
-
S’mores Style: Coat your pops in crushed graham crackers after dipping in chocolate for a fun, nostalgic treat reminiscent of campfire s’mores.
-
Fruit Fusion: Add some finely crushed dried fruit to your batter for a natural sweetness, enhancing both flavor and nutritional value.
Let your imagination run wild as you customize these tasty treats!
How to Store and Freeze Thanksgiving Cake Pops
Room Temperature: Store your Thanksgiving Cake Pops at room temperature in an airtight container for up to 3 days. Make sure they are completely dry before sealing to avoid moisture.
Fridge: If you want to keep them fresh longer, place the cake pops in the fridge for up to a week. Be sure they are covered to prevent them from drying out or absorbing odors.
Freezer: For longer storage, wrap each cake pop individually in plastic wrap and place them in a freezer-safe container. They can be frozen for up to 2 months.
Reheating: To enjoy frozen cake pops, let them thaw in the fridge overnight before serving. Avoid refreezing once thawed for the best taste and texture.
What to Serve with Thanksgiving Cake Pops?
As you prepare to impress your guests with a tray of these festive delights, consider what else will complement their sweet charm.
-
Hot Chocolate Bar: A warm, rich beverage adds comfort and pairs beautifully with the sweetness of cake pops for a cozy treat.
-
Pumpkin Spice Cookies: The warm spices in these cookies harmonize with the flavors of your cake pops, creating a fall-inspired dessert party.
-
Cranberry Sparkling Water: Refreshing and slightly tart, this drink cleanses the palate between bites and adds a festive flair to your gathering.
-
Chocolate Fondue: Set up a fondue station where guests can dip their cake pops into luscious melted chocolate for an indulgent twist.
-
Fruit Platter: Bright, fresh fruits provide a burst of color and contrast to the sweet treats, balancing flavors and adding a touch of healthiness.
-
Pecan Pie Bites: Miniature pecan pies offer a classic Thanksgiving flavor that pairs wonderfully with your cake pops, offering variety on the dessert table.
-
Caramel Sauce: Drizzling a little caramel over your cake pops enhances their sweetness; an irresistible addition that everyone will enjoy.
-
Coffee or Tea: A warm cup of coffee or an aromatic herbal tea would serve as the perfect end to a holiday feast paired with these festive pops.
Make Ahead Options
These Thanksgiving Cake Pops are perfect for meal prep, allowing you to enjoy the festive fun without the last-minute rush. You can bake the cake and crumble it up to 3 days ahead, storing the crumbled mixture in an airtight container in the refrigerator to maintain freshness. To keep the cake pops moist, mix in the frosting about 24 hours before decorating. When you’re ready to finish, simply roll the frosted mixture into balls, insert the sticks, dip in melted candy, and add your favorite decorations. This way, you’ll have delightful Thanksgiving Cake Pops ready to impress your guests with minimal effort on the big day!
Chef's Helpful Tips
- To achieve the best texture for your Thanksgiving Cake Pops, ensure the cake is completely cooled before crumbling it; warm cake can lead to a mushy mixture.
- When mixing in the frosting, do so gradually to avoid over-saturating the crumbs; you want the mixture to be moldable but not overly wet.
- For a smooth candy coating, stirring in a tablespoon of vegetable oil with your melted candy melts is essential, as it helps achieve the perfect consistency for dipping.
- Lastly, be patient and allow your decorated cake pops to set for at least 30 minutes; this ensures the coating hardens properly and the pops hold their shape.
Thanksgiving Cake Pops Recipe FAQs
How do I choose the right cake mix for my Thanksgiving Cake Pops?
Absolutely! While any flavor works, I recommend a classic yellow or chocolate for a crowd-pleasing effect. Look for a cake mix that is light and fluffy. Avoid mixes that are nearing their expiration date, as this could affect the taste and rise of your pops.
How should I store my Thanksgiving Cake Pops?
You can store your cake pops at room temperature in an airtight container for up to 3 days. If you want them to last longer, refrigerate them for up to a week, ensuring they’re covered to maintain moisture. Avoid stacking them to prevent smudging the decorations!
Can I freeze my Thanksgiving Cake Pops? How do I do it?
Yes, you can freeze these delightful treats! To freeze your Thanksgiving Cake Pops, wrap each one individually in plastic wrap. Then, place them in a freezer-safe container, ensuring they don’t touch one another. They’ll last up to 2 months. When you’re ready to enjoy, simply thaw them in the fridge overnight to retain their moistness.
What should I do if my cake pops are too soft to hold their shape?
Very! If your cake pops are too soft, it often means you added too much frosting. Simply place the mixture in the fridge for about 30 minutes until it firms up. Once cool, you can re-roll the mixture into balls and insert the sticks again.
Can kids help decorate the Thanksgiving Cake Pops? Are there any specific allergies to consider?
Oh, the more the merrier! Kids can help with decorating, which adds to the fun and creativity. Just be cautious of common allergens, especially if you use decorations like chocolate chips or certain sprinkles. Always check labels for gluten, dairy, or nut sensitivities. If in doubt, opt for allergy-free alternatives, which are widely available!
What’s a good replacement for candy melts if I want a healthier option?
Certainly! If you prefer a healthier option, consider using dark chocolate instead of candy melts. Simply melt the dark chocolate in a microwave-safe bowl with a teaspoon of coconut oil for smooth dipping. It adds a richer flavor while keeping things on the healthier side.
Equipment
- Baking pan
- Microwave-safe bowl
- Styrofoam block
- Parchment paper
Ingredients
For the Cake Mix
- 1 box cake mix your favorite flavor
For the Frosting
- 1 can canned frosting store-bought or homemade
For the Coating
- 2 cups candy melts
- 1 tablespoon vegetable oil
For Flavoring
- 1 teaspoon vanilla extract
For Assembly
- 12 pieces cake pop sticks
For Decorations
- 1 cup candy eyes
- 1 cup candy corn
- 1 cup sprinkles
- 1 tablespoon edible glitter
- 1 cup mini chocolate chips
Instructions
How to Make Thanksgiving Cake Pops
- Preheat your oven according to the cake mix box instructions.
- Pour the cake batter into a prepared pan and bake until golden brown, about 30 minutes. Allow to cool completely.
- Crumble the cake into fine crumbs using your hands or a fork.
- Mix in the frosting gradually until the cake crumbs are moist enough to roll into balls.
- Roll the mixture into small balls, about 1-inch in diameter, and place them on a baking sheet lined with wax paper.
- Melt a small amount of candy coating and dip one end of each cake pop stick into it.
- Insert the sticks into the center of each cake ball, about halfway through.
- Melt your candy melts along with vegetable oil until smooth, stirring regularly.
- Dip each cake pop into the melted candy coating and let any excess drip off.
- Decorate while the coating is still wet with candy eyes, candy corn, sprinkles, or mini chocolate chips.
- Stick the decorated cake pops into a Styrofoam block or place them on a parchment paper-lined tray to dry for 30 minutes to 1 hour.
- Once dry, your Thanksgiving Cake Pops are ready to serve!


