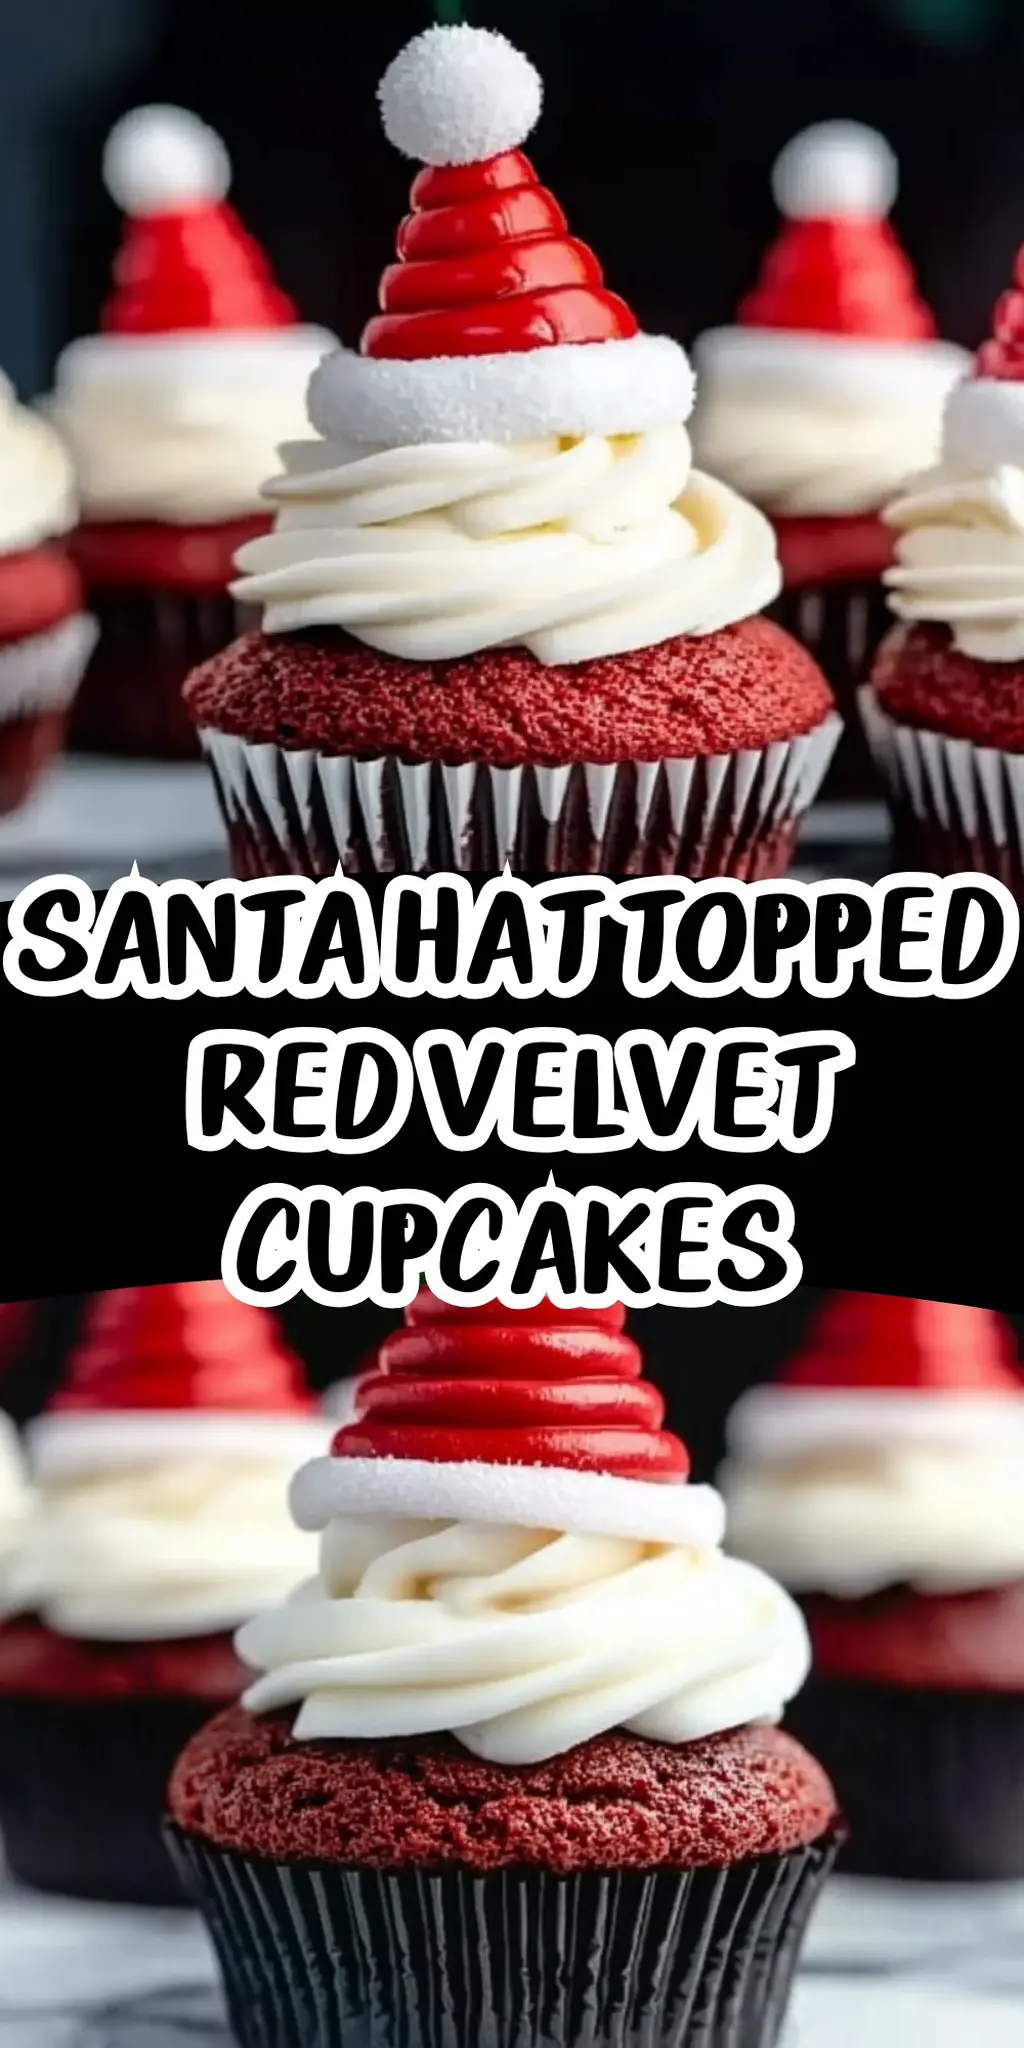
As the holiday season approaches, I can’t help but feel the excitement in the air—a blend of twinkling lights, cozy gatherings, and sweet treats! When I decided to whip up something special for a recent festive get-together, I stumbled upon a delightful idea that transformed my cupcakes into a cheerful holiday centerpiece: Santa Hat Topped Red Velvet Cupcakes.
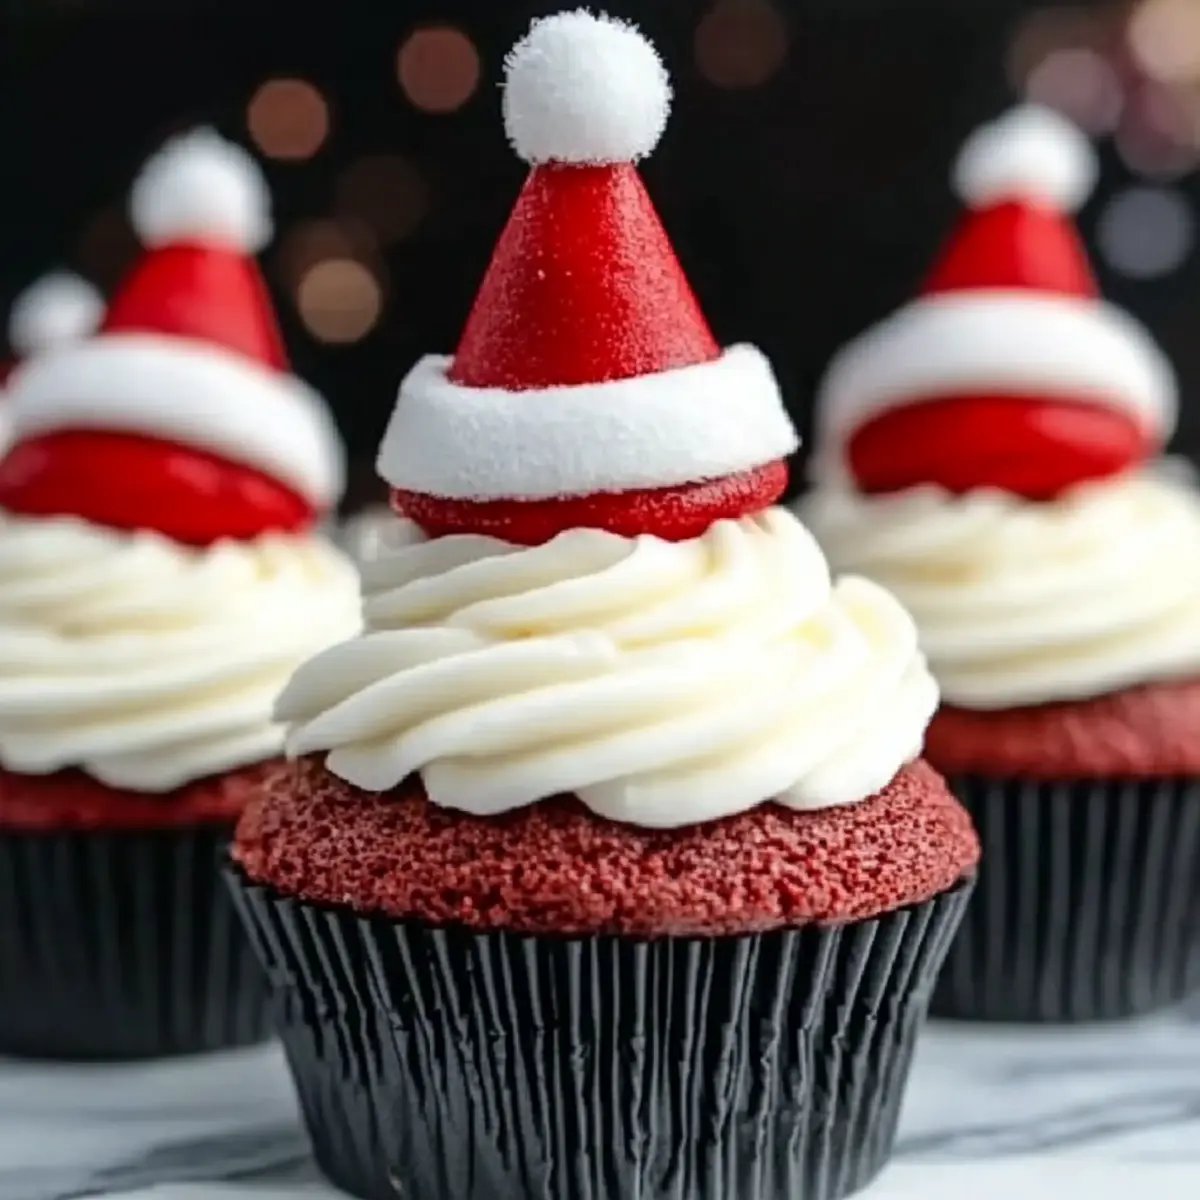
Imagine the deep, rich flavor of red velvet goodness paired with the luscious creaminess of whipped frosting, all capped off with a bright, juicy strawberry that resembles Santa’s iconic hat. With just a handful of ingredients and a bit of creativity, these cupcakes are not only a feast for the eyes but also a delicious solution to any holiday dessert dilemma.
Whether you’re a home cook looking to impress or simply someone craving a little holiday magic, this recipe combines flavor, fun, and elegance—all in one bite. Join me in creating these festive delights that are sure to spread joy and warmth, one scrumptious cupcake at a time!
Why You'll Love This Santa Hat Topped Red Velvet Cupcakes
- These Santa Hat Topped Red Velvet Cupcakes are incredibly easy to make, making them perfect for any skill level in the kitchen.
- The rich, velvety flavor combined with the light whipped topping and fresh strawberries creates a delightful taste sensation that will leave everyone wanting more.
- Their festive appearance adds a visually stunning touch to your holiday gatherings, making them the star of the dessert table.
- Plus, these cupcakes are a major crowd-pleaser, sure to impress family and friends at any festive occasion.
Santa Hat Topped Red Velvet Cupcakes Ingredients
For the Cupcake Batter
- All-purpose flour – essential for that fluffy texture; be sure to measure accurately!
- Granulated sugar – adds sweetness and moisture; consider brown sugar for a richer flavor.
- Cocoa powder – enhances the chocolate notes in the red velvet; Dutch-process cocoa works well too.
- Baking soda – provides leavening so your cupcakes rise perfectly; check for freshness!
- Salt – enhances flavor; a pinch is all you need!
- Buttermilk – keeps the batter moist and tender; you can substitute with yogurt mixed with milk.
- Vegetable oil – contributes to the moistness; melted butter can be used if preferred.
- Large eggs – provide structure and richness; bring them to room temperature for best results.
- Vanilla extract – infuses a warm sweetness; pure vanilla is the best for flavor.
- White vinegar – activates the baking soda and keeps the cupcakes light; lemon juice is a good alternative.
- Red gel food coloring – gives that quintessential red velvet hue; gel creates a vibrant color without altering the batter consistency.
For the Topping
- Fresh ripe strawberries – the cutest “Santa hats” on your cupcakes; choose the largest berries for the best presentation.
- Whipped cream or frosting – adds a creamy layer that balances the flavors; use your favorite recipe or store-bought for convenience.
- Powdered sugar (optional) – helps stabilize whipped toppings; sprinkle it in if using fresh cream.
- Vanilla extract (for whipped topping) – enhances the flavor of the frosting; it’s worth adding an extra splash!
These festive Santa Hat Topped Red Velvet Cupcakes are sure to be a hit at your holiday gatherings, adding both flavor and whimsy to your celebrations!
How to Make Santa Hat Topped Red Velvet Cupcakes
-
Preheat your oven to 350°F (175°C) and prepare a 12-cup muffin tin with cupcake liners. This ensures a perfect bake for your festive treats!
-
Whisk together the flour, cocoa powder, baking soda, and salt in a bowl. This mix creates the base for your delightful cupcakes; make sure it’s well combined!
-
Mix the wet ingredients in a separate bowl. Whisk together the eggs, granulated sugar, buttermilk, vegetable oil, vanilla extract, white vinegar, and red gel food coloring until smooth. This vibrant mixture will give your cupcakes both flavor and that iconic red hue!
-
Combine the dry ingredients with the wet mixture. Gently stir until just combined, being careful not to overmix. You want to maintain that tender texture!
-
Fill each cupcake liner about two-thirds full with your luscious batter. Use a scoop for even portions and a mess-free application!
-
Bake in the preheated oven for 16-18 minutes. They’re ready when the centers spring back upon touch. Your kitchen will smell heavenly!
-
Cool completely on a wire rack before decorating. Patience pays off as you want the frosting to set perfectly!
-
Trim the tops of the cupcakes to create flat bases. This step makes it easier to decorate and gives a polished look!
-
Pipe frosting: Use a piping bag to swirl a beautiful mound of whipped cream or frosting onto each cupcake, creating a lovely snowy base.
-
Add strawberries: Place fresh strawberries upside down on each frosted cupcake to resemble Santa’s hat. Don’t forget to add a little frosting dot on top for that classic fluffy hat tip!
Optional: Dust with a sprinkle of powdered sugar for an extra festive touch.
Exact quantities are listed in the recipe card below.
Santa Hat Topped Red Velvet Cupcakes Variations
Feel free to explore these delightful twists and swaps to personalize your festive cupcakes!
-
Dairy-Free: Substitute buttermilk with almond milk mixed with a tablespoon of vinegar for a similar tangy flavor.
-
Gluten-Free: Use a gluten-free all-purpose flour blend to accommodate those with dietary restrictions. They’ll be just as soft and tasty!
-
Chocolate Lovers: Add ½ cup of mini chocolate chips to the batter for an extra chocolaty surprise in every bite. Yum!
-
Spice Boost: Mix in ½ teaspoon of cinnamon or nutmeg for a warm, spiced layer that adds holiday cheer to the flavor profile.
-
Nutty Crunch: Top the frosting with finely chopped pecans or walnuts for a delightful contrast in texture and a nutty flavor that complements the sweetness.
-
Fruit Twist: Swap strawberries for raspberries or blackberries; their tartness will add an exciting punch to the frosting’s sweetness.
-
Vegan: Replace eggs with flaxseed meal (1 tablespoon ground flax mixed with 2.5 tablespoons water), and use coconut oil instead of vegetable oil for a delicious vegan option.
-
Mini Cupcakes: Create bite-sized versions by using a mini cupcake pan; adjust baking time to 10-12 minutes for the perfect small treat.
Embrace your creativity and elevate these Santa Hat Topped Red Velvet Cupcakes into a personalized holiday delight!
How to Store and Freeze Santa Hat Topped Red Velvet Cupcakes
Room Temperature: Store cupcakes in an airtight container for up to 2 days. Keep them cool and away from direct sunlight to maintain freshness.
Fridge: If you’ve already topped them with strawberries and frosting, store in the refrigerator for up to 3 days. This will help keep the whipped cream nice and fluffy while preserving the strawberries.
Freezer: For longer storage, freeze unadorned cupcakes in a single layer on a baking sheet for up to 3 months. Once frozen, wrap them tightly in plastic wrap and place in a freezer bag.
Reheating: To enjoy your Santa Hat Topped Red Velvet Cupcakes, thaw them overnight in the fridge, then let them come to room temperature. Freshen them up by piping on a bit more frosting before serving!
Make Ahead Options
These Santa Hat Topped Red Velvet Cupcakes are a perfect choice for meal prep enthusiasts! You can prepare the cupcake batter and bake the cupcakes up to 24 hours in advance. Simply allow them to cool completely and then store them in an airtight container at room temperature to maintain their moisture. For the frosting and strawberry hats, you can whip the cream up to 3 days ahead and refrigerate it (adding powdered sugar helps it hold). When it’s time to serve, just pipe the frosting on top of the cooled cupcakes, place the strawberries, and enjoy the same festive, delicious flavors as if they were freshly made! This way, your busy day can feel a little less hectic while still delighting everyone with these charming treats.
What to Serve with Santa Hat Topped Red Velvet Cupcakes?
As you prepare these festive delights, consider the perfect accompaniments that will elevate your holiday gatherings to the next level.
- Rich Hot Chocolate: A warm mug of hot chocolate topped with whipped cream enhances the sweetness of the cupcakes and adds cozy warmth to every bite.
- Peppermint Bark: This crunchy, seasonal treat brings a refreshing minty flavor that contrasts beautifully with the rich chocolate of the cupcakes.
- Creamy Eggnog: This classic holiday drink offers a nutmeg-spiced creaminess that pairs wonderfully with the velvety texture of red velvet.
- Fresh Fruit Salad: A bright medley of citrus and berries adds a refreshing balance, cutting through the sweetness of the cupcakes. The burst of flavors will delight your guests!
- Cheesecake Bites: Mini cheesecake bites provide a richer option that complements the lightness of the whipped topping and strawberries, resulting in a heavenly trio on your dessert table.
- Sparkling Water with Lime: Provide a refreshing, non-alcoholic option with a splash of lime that cleanses the palate while enhancing the festive atmosphere.
- Winter Spiced Cookies: Cozy cookies with spices like cinnamon and ginger bring a homely vibe that feels like a warm embrace alongside your cupcakes.
- Chocolate Milkshake: This indulgent drink adds to the fun, combining chocolate flavor with a creamy texture that will delight adults and kids alike; a sweet celebration in glass!
- Caramel Sauce: Drizzling a bit of warm caramel over the strawberries or on the plate adds a touch of gourmet elegance and extra indulgence.
Serve these scrumptious pairings alongside your Santa Hat Topped Red Velvet Cupcakes, and watch your holiday dessert table come to life with joy and flavor!
Chef's Helpful Tips
- When making Santa Hat Topped Red Velvet Cupcakes, be sure to measure your ingredients accurately to ensure the perfect texture.
- Avoid overmixing the batter as it can lead to tough cupcakes; gently fold until just combined.
- For a vibrant red color, use gel food coloring instead of liquid as it won’t alter your batter’s consistency.
- After baking, allow the cupcakes to cool completely to avoid melting your frosting when decorating.
Santa Hat Topped Red Velvet Cupcakes Recipe FAQs
How do I choose ripe strawberries for the topping?
When selecting strawberries for your Santa Hat Topped Red Velvet Cupcakes, look for berries that are bright red, firm, and have a glossy appearance. Avoid any with dark spots or a dull color, as these can indicate overripeness. Always opt for fresh, local strawberries if possible, as they tend to be juicier and more flavorful.
How should I store my Santa Hat Topped Red Velvet Cupcakes?
Store your cupcakes in an airtight container to keep them fresh. If they are frosted with whipped cream and topped with strawberries, refrigerate them for up to 3 days. Otherwise, they can be kept in a cool, dry place for about 2 days at room temperature. Keep them away from sunlight to maintain their deliciousness!
Can I freeze Santa Hat Topped Red Velvet Cupcakes?
Absolutely! You can freeze unadorned cupcakes for up to 3 months. To do this, first, arrange them in a single layer on a baking sheet until they are frozen solid (about 2 hours). Then, wrap each cupcake individually in plastic wrap and place them in a freezer-safe bag. When you’re ready to enjoy, simply thaw them in the fridge overnight before piping on fresh frosting and adding strawberries.
What should I do if my cupcakes sink in the middle?
If your Santa Hat Topped Red Velvet Cupcakes sink, it might be due to overmixing the batter or not baking them long enough. Ensure you mix the batter gently until just combined, and always check for doneness by lightly touching the center; it should spring back. If they sink, an extra minute or two in the oven can help firm them up, but keep a close eye to prevent over-baking!
Are there any dietary considerations I should be aware of?
If you’re accommodating dietary restrictions, note that these cupcakes contain gluten, dairy, and eggs. For a gluten-free version, you can substitute the all-purpose flour with a gluten-free flour blend. To make them dairy-free, consider using almond milk and a dairy-free butter substitute, though it may slightly alter the final texture. Always check ingredients like whipped cream, as store-bought versions can contain various allergens.
What frosting works best for these cupcakes?
While whipped cream is delightful, you might also consider a cream cheese frosting for a richer flavor. If you’re aiming for more stability in warmer climates, using a buttercream frosting can help maintain the shape and presentation of your Santa hats. If you’re short on time, don’t hesitate to use store-bought frosting for convenience!
Equipment
- muffin tin
- Mixing bowls
- Whisk
- piping bag
Ingredients
Cupcake Batter
- 2 cups all-purpose flour essential for that fluffy texture
- 1 cup granulated sugar adds sweetness and moisture
- 2 tbsp cocoa powder enhances the chocolate notes
- 1 tsp baking soda provides leavening
- 1 tsp salt enhances flavor
- 1 cup buttermilk keeps the batter moist
- 1/2 cup vegetable oil contributes to the moistness
- 2 large eggs provide structure and richness
- 1 tsp vanilla extract infuses a warm sweetness
- 1 tsp white vinegar activates the baking soda
- 1 tbsp red gel food coloring gives that quintessential red velvet hue
Topping
- 12 pieces fresh ripe strawberries largest berries for presentation
- 2 cups whipped cream or frosting adds a creamy layer
- powdered sugar optional, helps stabilize whipped toppings
- 1 tsp vanilla extract for whipped topping, enhances flavor
Instructions
Cupcake Preparation
- Preheat your oven to 350°F (175°C) and prepare a 12-cup muffin tin with cupcake liners.
- Whisk together the flour, cocoa powder, baking soda, and salt in a bowl.
- Mix the wet ingredients in a separate bowl, whisking together eggs, granulated sugar, buttermilk, vegetable oil, vanilla extract, white vinegar, and red gel food coloring.
- Combine the dry ingredients with the wet mixture, stirring until just combined.
- Fill each cupcake liner about two-thirds full with the batter.
- Bake in the preheated oven for 16-18 minutes.
- Cool completely on a wire rack before decorating.
- Trim the tops of the cupcakes to create flat bases.
- Pipe frosting onto each cupcake, creating a mound.
- Add strawberries upside down on each frosted cupcake to resemble Santa’s hat.