There’s something incredibly comforting about the smell of warm pears mingling with the rich, nutty scent of brown butter wafting through my kitchen. This Brown Butter Pear Tart has become one of my go-to desserts, especially when I want to impress family and friends without spending all day in the kitchen. When the first hint of autumn arrives, and the air gets a bit crisper, I find myself craving the delicate sweetness of ripe pears nestled within a flaky, buttery crust.
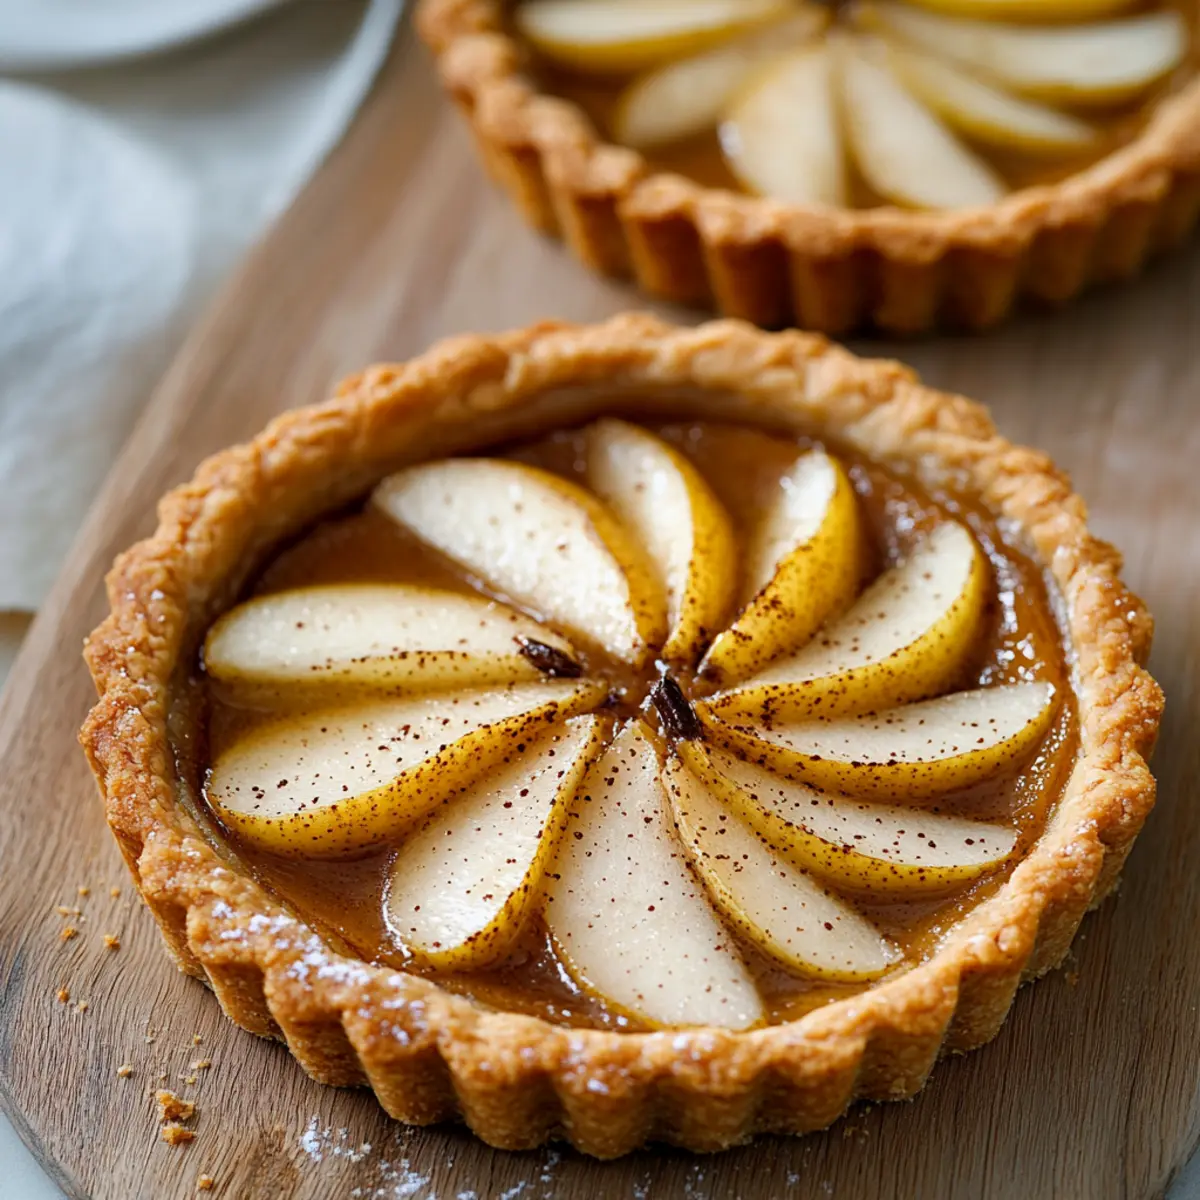
What I love most about this recipe is how effortlessly it elevates a simple gathering into something special. Each bite of this tart reveals layers of heavenly flavors—the luscious pears are perfectly complemented by the caramelized notes of brown butter and a hint of cinnamon. Best of all, this elegant dessert can be whipped up in under an hour, making it the ideal choice for both a cozy dinner or a festive celebration. Get ready to treat yourself and your loved ones with this delightful blend of simplicity and sophistication!
Why You'll Love This Brown Butter Pear Tart
- This Brown Butter Pear Tart is the perfect combination of simplicity and elegance, allowing you to impress your guests without spending all day in the kitchen.
- The warm, rich flavors of brown butter and sweet pears create a heavenly taste experience that is sure to please even the most discerning palates.
- Its visual appeal makes it a stunning centerpiece for any gathering, with the golden crust and beautifully arranged pears inviting everyone to take a slice.
- Plus, with a total prep and bake time of just an hour, you can easily fit this delightful dessert into your busy schedule while still making a memorable treat for friends and family.
Brown Butter Pear Tart Ingredients
• Here’s everything you need for this delightful tart!
For the Crust
- All-purpose flour – a key ingredient for a flaky and tender crust.
- Powdered sugar – adds a subtle sweetness that complements the crust’s texture.
- Salt – balances the flavors; don’t skip this!
- Unsalted butter (cold and cubed) – ensures a rich, buttery flavor in the crust.
- Large egg yolk – helps bind the crust together for a smooth finish.
- Cold water – adds moisture to bring the dough together, one tablespoon at a time.
For the Filling
- Unsalted butter – this will be browned to create that delicious, nutty flavor.
- Pears (peeled, cored, and sliced) – use ripe pears for a sweet and juicy filling; they’re the star of this Brown Butter Pear Tart!
- Granulated sugar – enhances the natural sweetness of the pears.
- Large eggs – provide structure to the filling.
- Vanilla extract – adds warmth and depth to the flavor profile.
- Ground cinnamon – a warm spice that complements the pears and enhances the tart’s aroma.
- Salt – a pinch elevates all the flavors in your filling.
- Heavy cream – brings richness and creaminess to the filling.
Now you have everything you need to create this stunning Brown Butter Pear Tart that will surely impress!

How to Make Brown Butter Pear Tart
-
Preheat your oven to 350°F (175°C) and prepare a tart pan by greasing it well with butter. This helps prevent the tart from sticking and ensures an easy release after baking.
-
Mix the dry ingredients by combining all-purpose flour, powdered sugar, and salt in a mixing bowl. Stir them together gently to incorporate the flavors evenly, creating a lovely base for your crust.
-
Cut the cold, cubed unsalted butter into the dry ingredients using a pastry cutter or your fingers. Continue mixing until the mixture resembles coarse crumbs. This step is crucial for a flaky crust!
-
Add the egg yolk and stir in the cold water, one tablespoon at a time, until the dough starts coming together. You want a soft yet firm dough, perfect for pressing into the tart pan.
-
Press the dough into the tart pan evenly across the bottom and up the sides, making sure to press it firmly without overworking it. Prick the bottom with a fork to prevent unwanted bubbling during baking.
-
Bake the crust in the preheated oven for 15–20 minutes or until it turns lightly golden brown. Once done, remove it from the oven and let it cool slightly while you prepare the filling.
-
Brown the butter in a medium saucepan over medium heat. Stir often until it turns a rich golden brown, developing a lovely nutty aroma. This step is essential for that distinctive flavor in your filling!
-
Whisk together granulated sugar, eggs, vanilla extract, ground cinnamon, and salt in a large mixing bowl. Gradually pour in the slightly cooled brown butter while mixing until the mixture is completely combined and smooth.
-
Stir in the heavy cream gently until fully incorporated. This will add a rich creaminess to your filling, enhancing the lusciousness of the tart.
-
Arrange your sliced pears in the cooled tart crust, distributing them evenly for a beautiful presentation. Imagine the warm, sweet aroma filling your kitchen!
-
Pour the brown butter mixture over the pears, ensuring they’re well coated. This will envelop the pears in that decadent flavor that makes this dessert so special.
-
Return the tart to the oven and bake for an additional 25–30 minutes or until the filling is set and the top is golden brown. The tart should have a slight jiggle, but not too much!
-
Cool the tart for at least 15 minutes before slicing. This allows the filling to firm up a bit, making it easier to serve.
-
Serve warm or at room temperature, optionally topped with whipped cream or a scoop of vanilla ice cream for an extra special treat!
Optional: Dust with powdered sugar before serving for an elegant touch.
Exact quantities are listed in the recipe card below.
How to Store and Freeze Brown Butter Pear Tart
-
Room Temperature: Allow the tart to cool completely, then store it at room temperature in an airtight container for up to 3 days. This keeps it fresh and delicious for every slice!
-
Fridge: To extend its lifespan, place the tart in the refrigerator, where it will stay fresh for about 5 days. Cover it with plastic wrap or foil to prevent it from absorbing any odors.
-
Freezer: You can freeze slices of the Brown Butter Pear Tart for up to 2 months. Wrap each slice tightly in plastic wrap, then place them in a heavy-duty freezer bag. Thaw overnight in the fridge before enjoying.
-
Reheating: For the best experience, reheat individual slices in the oven at 350°F (175°C) for about 10 minutes. This restores the tart’s flaky crust and enhances its warm, inviting flavors.
Make Ahead Options
These Brown Butter Pear Tart options are perfect for busy weeknights or special occasions, allowing you to savor the delightful flavors with minimal stress. You can prepare the tart crust up to 24 hours in advance; simply wrap it tightly in plastic wrap and refrigerate. The brown butter filling can also be made ahead and stored in an airtight container for up to 3 days in the refrigerator. When ready to serve, slice the pears and arrange them in the crust before pouring the cold brown butter mixture on top. Bake as directed, and you’ll have a stunning dessert that tastes just as fresh and delicious as if made that day!
What to Serve with Brown Butter Pear Tart?
Imagine the sweet aroma of pears and the warmth of cinnamon enveloping your kitchen, creating a cozy invitation for guests to gather around the table.
- Whipped Cream: Fluffy and sweet, it adds a light touch that balances the rich flavors of the tart.
- Vanilla Ice Cream: A classic pairing, its creamy texture melts beautifully over warm slices, providing a delightful contrast.
- Salty Caramel Sauce: Drizzling this warm, rich sauce introduces a sweet and salty complexity that enhances every bite of the tart.
- Toasted Almonds: Their crunch and nutty flavor echo the brown butter’s essence, adding an enjoyable texture alongside the soft pears.
- Sautéed Spinach: For a savory side, this lightly garlicky dish cuts through sweetness, creating a balanced meal with a fresh element.
- Hot Spiced Apple Cider: A comforting drink that echoes the tart’s flavors, it keeps you warm while enhancing the autumnal vibes.
- Herbed Goat Cheese Salad: Creamy and tangy, the salad’s herbs and acidity brighten the palate after the sweet dessert.
- Chocolate Espresso Cake: For the adventurous, this rich cake pairs beautifully, offering a deep chocolate contrast to the fruity tart.
- Chai Latte: Its spicy warmth complements the cinnamon in the tart, making it perfect for a cozy evening.
With these pairings, you’ll create a deliciously complete meal that’s perfect for gatherings or serene nights at home!
Brown Butter Pear Tart Variations
Feel free to get creative with this recipe and make it your own by exploring these delicious twists!
-
Gluten-Free: Substitute the all-purpose flour with a 1:1 gluten-free flour blend for a delightful tart everyone can enjoy.
-
Nutty Flavor: Add 1/2 cup of ground almonds or hazelnuts to the crust for a lovely nutty flavor that beautifully complements the pears.
-
Sweet Spice: Experiment by adding a pinch of nutmeg along with the cinnamon to enhance the warm, fragrant notes of your tart.
-
Fruit Swap: Try using apples or peaches instead of pears. Their sweetness and texture provide a delightful twist that allows for seasonal variations.
-
Dairy-Free: Replace the unsalted butter and heavy cream with coconut oil and full-fat coconut milk for a creamy, dairy-free alternative that doesn’t skimp on flavor.
-
Maple Twist: Substitute granulated sugar with maple syrup in the brown butter filling for an earthy sweetness that pairs perfectly with the pears.
-
Chocolate Drizzle: Once the tart cools, drizzle melted dark chocolate over the top for an indulgent twist that makes this dessert even more special.
-
Spicy Kick: Add a pinch of cayenne pepper to the filling for a surprising kick that contrasts beautifully with the sweetness of the tart.
Chef's Helpful Tips
- For the Brown Butter Pear Tart, ensure your butter is cold when making the crust to achieve that perfect flaky texture.
- Be careful not to overmix the dough; mix just until combined to maintain a tender crust.
- When browning the butter, watch it closely as it can go from perfectly golden to burnt in seconds.
- Allow the tart to cool properly before slicing to let the filling set, ensuring clean and beautiful slices when serving.
Brown Butter Pear Tart Recipe FAQs
What type of pears should I use for the tart?
Absolutely! For the best flavor and texture, I recommend using ripe, sweet pears like Bartlett or Anjou. They’re juicy and tender, which creates a delicious contrast to the flaky crust. Just make sure they’re not overly soft or damaged—look for firm pears with a slight give near the stem.
How should I store leftover Brown Butter Pear Tart?
Very good question! To store leftovers, let the tart cool completely before wrapping it in plastic wrap or placing it in an airtight container. It can be stored at room temperature for up to 3 days, but if you want it to last longer, refrigerate it for up to 5 days. Just make sure to cover it well to avoid any unwanted odors.
Can I freeze the Brown Butter Pear Tart?
Absolutely! Freezing is a great way to preserve this tart. After it has cooled completely, slice it into individual pieces and wrap each slice tightly in plastic wrap. Then, place them in a heavy-duty freezer bag. You can freeze them for up to 2 months. To enjoy, thaw the slices overnight in the fridge and reheat them in the oven at 350°F (175°C) for about 10 minutes.
How do I know when the tart is done baking?
The tart is done when the filling looks set and the top has a beautiful golden brown color. It should have a slight jiggle in the center—too much jiggle means it needs more time. Keep an eye on it during the last few minutes of baking to prevent overcooking, as ovens can vary in temperature.
Are there any dietary considerations for this recipe?
For those with dietary restrictions, this Brown Butter Pear Tart contains dairy and eggs, so it may not be suitable for vegans or individuals with egg allergies. If you’re looking for a dairy-free option, try substituting the unsalted butter with a plant-based alternative. Additionally, for gluten-free diners, consider using a gluten-free all-purpose flour blend to create a crust that’s just as flaky and delicious!
Can I use a different type of sweetener?
Certainly! If you want to experiment with sweeteners, you can use honey or maple syrup in place of granulated sugar for a distinct flavor profile. Just keep in mind that it may alter the texture slightly, so you may need to reduce the liquid in the recipe a bit if using a liquid sweetener. Enjoy the adventure in your baking!
Equipment
- tart pan
- Mixing bowl
- medium saucepan
- pastry cutter
Ingredients
Crust
- 1 cup All-purpose flour a key ingredient for a flaky and tender crust.
- 2 tablespoons Powdered sugar adds a subtle sweetness that complements the crust's texture.
- 1/4 teaspoon Salt balances the flavors; don't skip this!
- 1/2 cup Unsalted butter (cold and cubed) ensures a rich, buttery flavor in the crust.
- 1 large Egg yolk helps bind the crust together for a smooth finish.
- 2-3 tablespoons Cold water adds moisture to bring the dough together.
Filling
- 1/2 cup Unsalted butter this will be browned to create that delicious, nutty flavor.
- 3 cups Pears (peeled, cored, and sliced) use ripe pears for a sweet and juicy filling.
- 1/2 cup Granulated sugar enhances the natural sweetness of the pears.
- 2 large Eggs provide structure to the filling.
- 1 teaspoon Vanilla extract adds warmth and depth to the flavor profile.
- 1/2 teaspoon Ground cinnamon complements the pears and enhances aroma.
- 1/4 teaspoon Salt elevates flavors in your filling.
- 1/2 cup Heavy cream brings richness and creaminess to the filling.
Instructions
Preparation
- Preheat your oven to 350°F (175°C) and prepare a tart pan by greasing it well with butter.
- Mix the dry ingredients by combining all-purpose flour, powdered sugar, and salt in a mixing bowl.
- Cut the cold, cubed unsalted butter into the dry ingredients until resembling coarse crumbs.
- Add the egg yolk and stir in cold water, one tablespoon at a time, until the dough starts coming together.
- Press the dough into the tart pan evenly and prick the bottom with a fork.
- Bake the crust for 15–20 minutes or until lightly golden brown.
- Brown the butter in a medium saucepan over medium heat until it turns golden brown.
- Whisk together granulated sugar, eggs, vanilla extract, ground cinnamon, and salt.
- Gradually pour in the slightly cooled brown butter while mixing until completely combined.
- Stir in the heavy cream gently until fully incorporated.
- Arrange your sliced pears in the cooled tart crust and distribute them evenly.
- Pour the brown butter mixture over the pears, ensuring they’re well coated.
- Return the tart to the oven and bake for an additional 25–30 minutes until the filling is set.
- Cool the tart for at least 15 minutes before slicing to firm up the filling.
- Serve warm or at room temperature, optionally topped with whipped cream or a scoop of ice cream.