The holiday season brings a unique enchantment, and nothing captures that magic quite like homemade Christmas candy. The vibrant colors of red and green, paired with the refreshing taste of peppermint, create a treat that can brighten any gathering. I often find myself reminiscing about those snowy afternoons when my family gathered in the kitchen, laughter blending with the sweet scent of melting sugar. It’s incredible how a few simple ingredients can transform into a delightful confection that not only satisfies a sweet tooth but also warms the heart.
This Christmas candy recipe is a delightful blend of ease and elegance, perfect for those looking to embrace the spirit of the season without spending hours in the kitchen. In just 25 minutes, you’ll whip up a festive treat that’s sure to be a crowd-pleaser at holiday parties or as a cherished gift. So, gather your ingredients, and let’s create something that will sweeten your celebrations!
Why You'll Love This Christmas Candy
- This Christmas Candy recipe is incredibly easy to prepare, allowing you to enjoy the festive spirit without any hassle.
- The delightful combination of peppermint flavor and crunchy candy canes creates a sweet treat that’s bursting with holiday cheer.
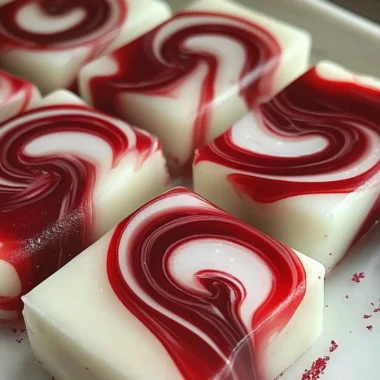
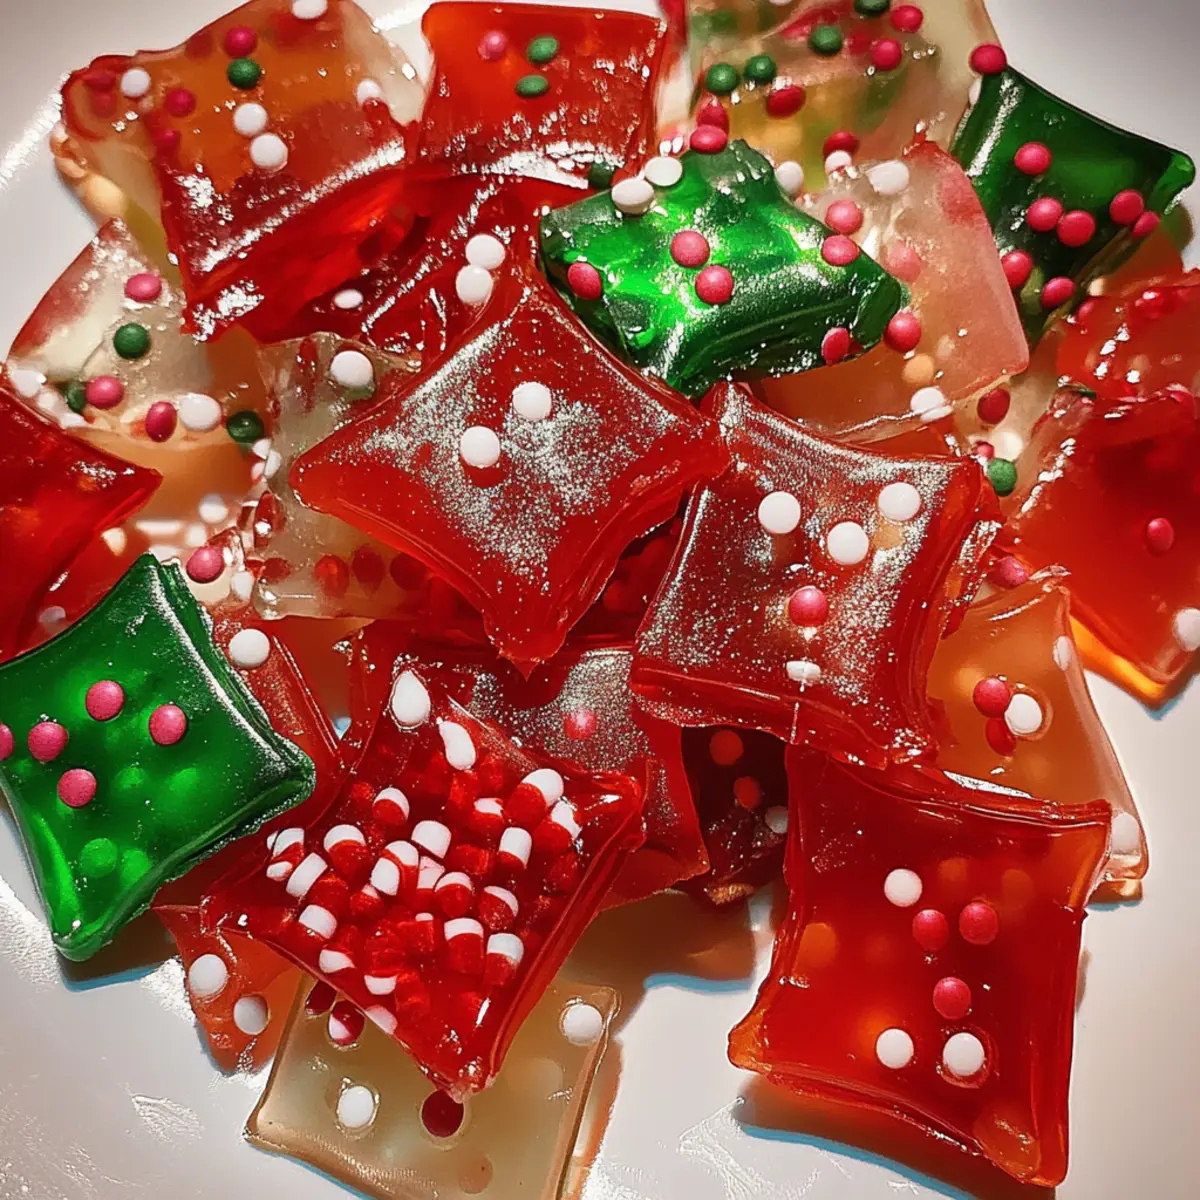
- With its vibrant red and green colors, this candy not only tastes great but also serves as a visually stunning centerpiece for any holiday gathering.
- Plus, it comes together in just 25 minutes, making it a perfect last-minute addition to your seasonal festivities.
Christmas Candy Ingredients
For the Candy Base
• 2 cups sugar – provides the sweet foundation for this vibrant treat.
• 1 cup corn syrup – helps achieve that perfect, glossy texture.
• 1/2 cup water – assists in dissolving the sugar evenly for a smooth mixture.
For the Flavoring
• 1 teaspoon peppermint extract – infuses a refreshing holiday taste that defines Christmas candy.
• Red and green food coloring – adds festive hues for a beautiful presentation.
For the Topping
• 1 cup crushed candy canes – brings a delightful crunch and extra minty flavor to your Christmas candy.

How to Make Christmas Candy
-
Combine ingredients: In a saucepan over medium heat, mix the sugar, corn syrup, and water. Stir gently until the sugar dissolves completely, creating a smooth blend.
-
Bring to a boil: Increase the heat slightly until the mixture begins to boil. It’s important not to stir during this stage, allowing the candy to reach the right consistency.
-
Cook to temperature: Use a candy thermometer to monitor the mixture as it cooks until it reaches the hard crack stage at 300°F. The candy should appear clear and bubbly, signaling it’s ready.
-
Remove from heat: Take the saucepan off the heat and quickly stir in the peppermint extract and a couple of drops of red and green food coloring. Be careful, as the mixture will bubble up a little.
-
Pour onto sheet: Immediately pour the candy mixture onto a greased baking sheet, using a spatula to spread it evenly. Allow it to settle slightly before adding your toppings.
-
Add candy canes: While the candy is still warm, generously sprinkle crushed candy canes on top, pressing them gently into the surface for extra flavor and crunch.
-
Cool and break: Let the candy cool completely at room temperature until it hardens. Once set, break it into pieces for sharing or enjoying yourself.
Optional: Drizzle with melted chocolate for an extra indulgent treat.
Exact quantities are listed in the recipe card below.
Make Ahead Options
These Christmas candy treats are a fantastic option for busy home cooks looking to streamline their holiday preparations! You can cook the candy mixture and allow it to cool up to 24 hours in advance. Store the cooled candy in an airtight container at room temperature to keep it fresh and avoid any stickiness. Just before serving or gifting, break it into pieces and package it nicely. For extra flair, feel free to melt some chocolate and drizzle it over the pieces right before serving; this keeps the candy just as delightful and vibrant as when it was made. Embrace the charm of homemade Christmas candy with this smart make-ahead strategy!
Christmas Candy Variations
Feel free to get creative and make this Christmas candy recipe your own with these delightful tweaks!
-
Dairy-Free: Use coconut cream instead of corn syrup for a tropical twist that adds a rich, creamy texture. Your candy will take on a lovely flavor all its own!
-
Nutty Addition: Stir in 1/2 cup of finely chopped nuts, like almonds or pecans, for a delightful crunch that complements the softness of the candy. The nuttiness brings an unexpected depth.
-
Spicy Kick: Add a pinch of cayenne pepper to the candy mixture before it reaches the hard crack stage for a subtle heat that pairs beautifully with peppermint. It’s a surprise your taste buds will adore!
-
Chocolate Drizzle: Melt dark or white chocolate and drizzle it over the cooled candy for an indulgent finishing touch. The creamy chocolate perfectly balances the refreshing peppermint.
-
Fruity Flavor: Substitute 1 teaspoon of orange or cherry extract for the peppermint to create a whole new flavor profile that’s just as festive. It’s a sweet nod to summer fruits, even in winter!
-
Layered Treats: Pour half the candy mixture onto the baking sheet, allow it to set slightly, then add a layer of crushed nuts or other toppings before pouring the remaining candy mixture on top for a beautiful layered effect.
-
Holiday Sprinkles: Before the candy sets, sprinkle colorful holiday-themed sprinkles on top for a pop of fun and festiveness. These little bursts of color will surely delight your guests.
-
Flavor Blends: Combine peppermint extract with a drop of almond extract for a unique, aromatic flavor that feels both classic and innovative. This twist adds a lovely, sophisticated hint that everyone will appreciate.
How to Store and Freeze Christmas Candy
Room Temperature: Keep your Christmas candy in an airtight container at room temperature for up to one week to maintain its freshness and crunch.
Fridge: For longer storage, place the candy in the fridge for up to two weeks, ensuring it’s well-wrapped to avoid moisture.
Freezer: To freeze, wrap the candy tightly in plastic wrap and place it in a freezer bag. It will stay good for up to three months; just allow it to come to room temperature before enjoying.
Reheating: If the candy feels too hard after freezing, let it sit at room temperature for a while. Avoid reheating, as it may affect the texture and flavor of your delightful Christmas candy.
What to Serve with Christmas Candy?
The joy of homemade treats is beautifully complemented by delightful sides and sips that elevate the festive spirit.
-
Hot Cocoa: A rich, creamy hot cocoa pairs perfectly, enhancing the comforting essence of the candy while adding warmth.
-
Peppermint Bark: This sweet shareable treat echoes the minty essence of the candy and creates a delightful flavor symphony at holiday gatherings.
-
Sugar Cookies: Soft, buttery sugar cookies with light frosting provide a lovely contrast in texture while keeping the sugary delights flowing.
-
Fruit Salad: Fresh, vibrant fruit adds a refreshing burst to your dessert table, balancing the sweetness of the candy with natural juiciness.
-
Roasted Nuts: Seasoned roasted nuts introduce a crunchy, savory element that provides contrast and depth to your holiday spread. They’re great for munching on between candy bites, too!
-
Sparkling Cider: Elevate your celebration with bubbly sparkling cider, as its crisp effervescence cuts through the sweetness, making each bite of candy feel like a festive toast.
Chef's Helpful Tips
- When making Christmas Candy, ensure to stir the sugar, corn syrup, and water gently at first to prevent the sugar from crystallizing.
- A common mistake is to stir the mixture once it reaches a boil; remember that stirring can lead to grainy candy, so keep it untouched during this stage.
- Use a reliable candy thermometer to accurately monitor the temperature, allowing you to hit the hard crack stage at 300°F without any guesswork.
- Allow the candy to cool completely before breaking it into pieces to ensure a nice clean cut and perfect texture throughout.
Christmas Candy Recipe FAQs
What type of sugar should I use for Christmas candy?
Absolutely! Granulated white sugar is the best choice for this Christmas candy recipe. It dissolves easily and helps achieve that perfect crunchy texture. Avoid using brown sugar, as it may alter the candy’s sweetness and consistency.
How do I know if the candy has reached the hard crack stage?
To determine if your candy has reached the hard crack stage at 300°F, you can do a simple drop test. Using a spoon, drop a bit of the hot candy mixture into a cup of cold water. If it forms a hard, brittle ball that breaks easily, you’ve hit the target temperature. This ensures your candy will set perfectly!
What is the best way to store Christmas candy?
I recommend keeping your Christmas candy in an airtight container at room temperature for up to one week. If you plan to enjoy it later, store it in the fridge for a bit longer, up to two weeks, making sure it’s well-wrapped to avoid moisture. If you want to freeze it, tightly wrap each piece in plastic wrap, then place it in a freezer bag; it will stay fresh for up to three months.
Can I use sugar substitutes in this Christmas candy recipe?
Using sugar substitutes isn’t straightforward in candy-making due to the crucial role sugar plays in achieving the right texture. However, if you’re looking for a lower-sugar option, you can experiment with products like erythritol, but remember it may change the flavor and texture. Always follow package instructions for conversions when substituting.
Is this Christmas candy recipe safe for pets?
Very! However, it’s important to remember that ingredients such as peppermint extract can be overpowering for pets and that sugary treats are not suitable for them. To keep your furry friends safe, always store the candy out of their reach and avoid sharing these sweets and focus on healthy pet treats instead!
Equipment
- saucepan
- Candy Thermometer
- spatula
- Baking Sheet
Ingredients
For the Candy Base
- 2 cups sugar provides the sweet foundation for this vibrant treat.
- 1 cup corn syrup helps achieve that perfect, glossy texture.
- 1/2 cup water assists in dissolving the sugar evenly for a smooth mixture.
For the Flavoring
- 1 teaspoon peppermint extract infuses a refreshing holiday taste.
- Red and green food coloring adds festive hues for a beautiful presentation.
For the Topping
- 1 cup crushed candy canes brings a delightful crunch and extra minty flavor.
Instructions
How to Make Christmas Candy
- In a saucepan over medium heat, mix the sugar, corn syrup, and water. Stir gently until the sugar dissolves completely.
- Increase the heat until the mixture begins to boil. Do not stir during this stage.
- Use a candy thermometer to cook the mixture until it reaches the hard crack stage at 300°F.
- Remove from heat and quickly stir in the peppermint extract and a couple of drops of red and green food coloring.
- Immediately pour the mixture onto a greased baking sheet, using a spatula to spread it evenly.
- While still warm, sprinkle crushed candy canes on top, pressing them gently into the surface.
- Let the candy cool completely until it hardens, then break into pieces.